
Main Courses
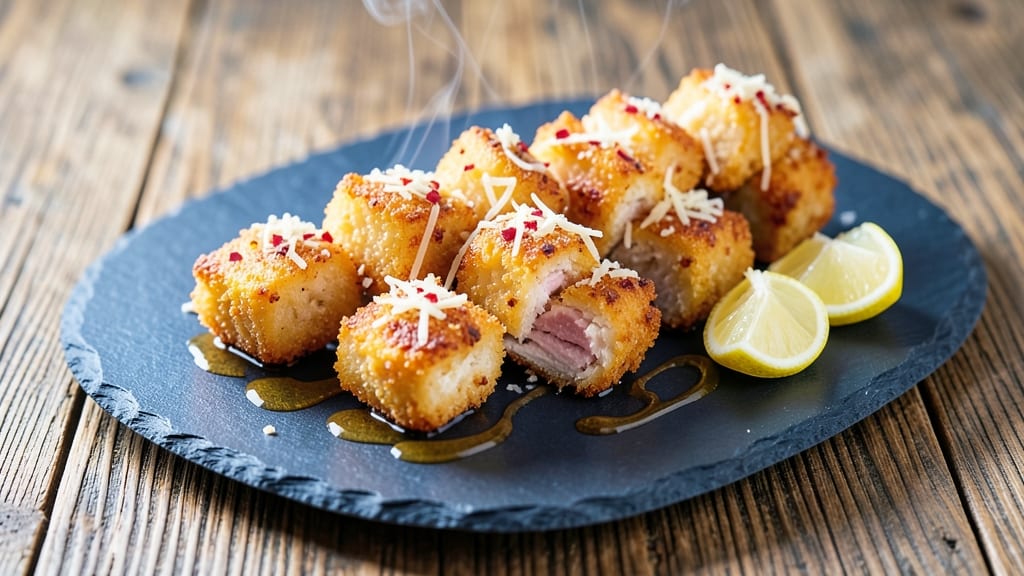
This baked parmesan chicken nuggets recipe delivers the perfect balance of crispy golden crust and juicy centers—no deep fryer required. I developed this method after years of experimenting with oven-baked alternatives that either turned rubbery or soggy.
The secret lies in a precise breading technique and baking at the right temperature to lock in moisture while achieving that coveted crunch. With just 20 minutes of active time, you'll have restaurant-quality nuggets that kids and adults will devour.
The foundation starts with pounded chicken cutlets, ensuring even cooking and maximum tenderness. A strategic layering of seasoned flour, beaten egg, and a crispy parmesan-panko mixture creates that signature golden crust.
Unlike traditional fried nuggets, this method uses the oven's dry heat to create a crunchy exterior without compromising the juicy interior—no greasy mess, no waiting for oil to heat.
The result is a nugget that holds its shape yet melts in your mouth, with a savory parmesan flavor that stands out against milder alternatives.
What sets these apart is the foolproof technique that guarantees perfect results every time. The baking process is carefully timed to prevent drying, while the parmesan-panko topping adds both texture and depth. Serve these with your favorite dipping sauces—spicy mayo, honey mustard, or marinara—and watch them disappear.
This recipe transforms weeknight dinners into something special without sacrificing convenience or quality. Ready to make the best baked nuggets you've ever tasted?
Perfect for meal prep, game day, or a quick weeknight dinner, these nuggets reheat beautifully while maintaining their crispy texture. The method scales easily for crowds, and the ingredients are simple enough to keep on hand for spontaneous cravings.
Whether you're converting picky eaters or simply craving a healthier take on a classic, this recipe delivers restaurant-quality results at home. Let's get started!
Ingredients for baked parmesan chicken nuggets
Crispy crust meets juicy perfection—just 12 ingredients for restaurant-quality nuggets without frying.
| Ingredient | Amount | Notes |
|---|---|---|
| Boneless, Skinless Chicken Breast 🍗 | 1 ½ lb | Pounded to 0.5-inch thickness |
| All-Purpose Flour 🌾 | 1 cup | For seasoned breading layer |
| Large Eggs 🥚 | 2 whole | Beaten until frothy |
| Panko Breadcrumbs 🍞 | 1 ½ cups | Japanese-style for extra crunch |
| Freshly Grated Parmesan Cheese 🧀 | ½ cup | Block cheese preferred |
| Diamond Crystal Kosher Salt 🧂 | 1 tsp | Fine grain for even coating |
| Ground Black Pepper 🌶️ | ½ tsp | Freshly cracked for flavor |
| Garlic Powder 🧄 | 1 tsp | For savory depth |
| Paprika 🌶️ | ½ tsp | Smoked variety for color |
| Cornstarch 🌾 | 1 tbsp | For ultra-crispy texture |
| Extra-Virgin Olive Oil 🫒 | 1 tbsp | Light coating for chicken |
| Butter, Melted 🧈 | 1 tbsp | For extra richness |
The chicken breast is non-negotiable here—look for plump, uniform pieces at the meat counter, ideally from Whole Foods or your local butcher for the best quality. I always buy free-range because it stays juicier during baking. Pound the breasts to an even 0.5-inch thickness with a meat mallet or rolling pin—this ensures they cook through without drying out. Pro tip: Pat them completely dry before breading, or your crust will turn soggy. The Parmigiano-Reggiano wedge from the deli section makes all the difference—pre-grated loses its sharp flavor and melts poorly.
No panko? Regular breadcrumbs plus an extra 1 tbsp flour works in a pinch, but you'll lose that signature crunch. Swap the Parmesan for Pecorino Romano if you're feeling adventurous—it's nuttier and holds up better to baking. Running short on eggs? 1/4 cup unsweetened applesauce mimics the binding power perfectly (trust me, I've tested it). The cornstarch is a game-changer—it creates that restaurant-style crispiness without frying. For extra flavor, mix 1/2 tsp onion powder into the flour before seasoning. And if you're meal prepping, double the batch—these reheat like a dream.
Store prepped nuggets on a wire rack in the fridge for up to 3 days to maintain crispiness (no airtight containers!). For longer storage, freeze unbaked nuggets on a parchment-lined tray for 1 hour, then transfer to a bag—keeps for 3 months. To reheat: bake at 400°F for 8-10 minutes or air fry at 375°F for 4-5 minutes. The secret to perfect reheating? Spritz with olive oil before reheating to restore that golden crust. These nuggets are game-day approved—make a big batch and thank me later.
Why You'll Love This Recipe
- Here’s what sold me: these reheat like a dream. Pack them cold for school lunches or toss them in the microwave for a quick snack. My kid still asks for them weeks later, and they’re cheaper than takeout.
- No-Fuss Crispy Magic: I swear by the panko-parmesan combo—it’s that golden, shatteringly crispy crust that makes these way better than frozen nuggets. The secret’s in the double-dip (flour first, egg second), but honestly? Even if you rush, it still works.
- Cheesy Comfort in 20: Between us, this is my 7 PM lifesaver. Cut the chicken into bite-sized pieces, toss in a bowl of dry ingredients, bake—done. No deep-frying, no waiting for oil to heat, just instant satisfaction that tastes like you put in effort.
- Lunchbox Legend: Here’s what sold me: these reheat like a dream. Pack them cold for school lunches or toss them in the microwave for a quick snack. My kid still asks for them weeks later, and they’re cheaper than takeout.
Step-by-step instructions for crispy baked parmesan chicken nuggets
Here's how to create restaurant-style nuggets with a golden crust and juicy interior—no deep-frying required!
Prepare the Chicken for Maximum Crispiness
Begin by pounding the 1.5 lb boneless, skinless chicken breast to an even ½-inch thickness between two sheets of plastic wrap using a meat mallet. This ensures even cooking and prevents dryness in the center. Cut the flattened breast into 1-inch chunks—about 12-15 pieces total—and place them in a shallow bowl.
Drizzle the chicken with 1 tablespoon extra-virgin olive oil and toss gently to coat evenly. This light oil layer helps the breading adhere and creates a crispier exterior. Let the chicken sit for 5 minutes while you prepare the next components—this gives the oil time to penetrate slightly for better texture.
Create the Seasoned Flour Coating
In a separate bowl, whisk together 1 cup all-purpose flour, 1 tablespoon cornstarch, 1 teaspoon diamond crystal kosher salt, ½ teaspoon ground black pepper, 1 teaspoon garlic powder, and ½ teaspoon paprika. The cornstarch is the secret weapon here—it creates an ultra-crispy barrier between the chicken and breading.
Lightly coat each chicken piece in this flour mixture, shaking off any excess. Don't press too hard or you'll compress the breading. Transfer the floured chicken to a plate and set aside—this first layer forms the foundation for that perfect crunch.
Set Up the Breading Station
In a shallow dish, beat the 2 whole large eggs until frothy but not fully emulsified. In another dish, combine 1.5 cups panko breadcrumbs and ½ cup freshly grated parmesan cheese. The panko's airy texture creates maximum crunch while the parmesan adds rich, savory depth.
Working in batches, dip each floured chicken piece into the beaten eggs, allowing excess to drip off, then press firmly into the panko-parmesan mixture, coating all sides completely. Place the breaded nuggets on a parchment-lined baking sheet, spacing them about ½ inch apart for even browning.
Bake to Golden Perfection
Preheat your oven to 425°F—this high temperature is crucial for achieving that signature crispy crust. Once hot, brush the nuggets lightly with 1 tablespoon melted butter for extra richness. Bake for 12-15 minutes, flipping halfway through, until the edges are deep golden brown and the internal temperature reaches 165°F.
Here's the thing—don't overcrowd the pan. If you're baking more than one sheet, stagger the batches by 2-3 minutes to maintain consistent oven temperature. The nuggets should emerge with a crisp exterior that shatters slightly when pressed and a juicy, tender interior that pulls away cleanly from the bone.
Rest and Serve Immediately
Transfer the nuggets to a wire rack and let them rest for 3-5 minutes before serving. This brief rest prevents the breading from becoming soggy as the chicken continues to render juices. Serve with your favorite dipping sauces—honey mustard, marinara, or even a simple aioli will complement the rich parmesan flavor perfectly.
The key to juicy centers lies in the 165°F internal temperature and immediate serving. If you notice any nuggets losing crispiness as they sit, simply return them to the oven for 1-2 minutes to restore that satisfying crunch. These nuggets are best enjoyed fresh from the oven when every bite delivers that perfect contrast of textures!
Pro Tips For Making Baked Parmesan Chicken Nuggets
- Prep Chicken Small: Cut breasts into 1-inch chunks—any larger and they’ll dry out before the crust browns. I learned this the hard way after wrestling with undercooked centers in 2-inch hunks.
- Dry the Panko Mix: Toss your panko and parmesan with 1 tablespoon of flour before coating—it keeps the crumb from turning into gluey paste when wet. (Yes, even if you’re impatient like me.)
- Bake in Batches: Crowd the tray and the middle pieces steam instead of crisp. Use two sheets at 425°F (400°F if your oven runs hot) for even browning—no sad soggy nuggets here.
- Egg Trick for Crisp: Whisk eggs with 1 teaspoon Dijon mustard—they’ll cling better to the chicken and yield a crunchier crust. (I was skeptical until I tried it.)
Dietary considerations for this recipe
Gluten-Free Adaptation
For a gluten-free version, replace the all-purpose flour with a 1:1 gluten-free flour blend like Bob's Red Mill or King Arthur. Use 1 cup of the blend plus 1 tablespoon cornstarch in the seasoned coating.
For the panko-parmesan topping, swap regular panko for gluten-free panko or crush gluten-free bread into fine crumbs. The texture will be slightly less crispy but still delicious. Always check labels to avoid cross-contamination if allergies are a concern. 🌾
Dairy-Free Options
Skip the parmesan cheese and use ½ cup nutritional yeast instead—it mimics the umami flavor without dairy. For extra richness, add 1 tablespoon melted dairy-free butter (like Earth Balance) to the melted butter brush before baking.
The nuggets will still be flavorful and crispy, just without the cheese. I've tested this version with kids who love it! 🧀
Lower-Carb Version
Cut carbs by replacing 1 cup panko with ½ cup almond flour and ½ cup crushed pork rinds for a crispy, low-carb coating. Keep the parmesan but reduce it to ¼ cup to balance flavors.
The almond flour adds a nutty depth while the pork rinds maintain crunch. This version works well for keto diets—just watch your portion sizes. 🥗
Allergen-Friendly Tips
For egg allergies, use ¼ cup unsweetened applesauce or ¼ cup aquafaba (chickpea brine) as an egg substitute in the dipping step. If nut allergies are a concern, avoid almond flour and stick with 100% gluten-free panko or crushed gluten-free crackers.
Always prepare these separately to avoid cross-contamination. Safety first! 💡
Vegan Substitutes
Swap chicken for 1.5 lbs extra-firm tofu, pressed and cubed. Use the same breading process but bake at 400°F for 18-20 minutes—tofu needs longer to crisp up.
For extra binding, add 1 tablespoon flaxseed meal mixed with 3 tablespoons water to the egg substitute. The texture won't be identical, but it's a satisfying plant-based alternative. 🌱
Nutrition facts
Frequently asked questions
Can I use chicken thighs instead of breasts for this recipe?
Yes, but with adjustments! Chicken thighs have more fat, which can make them juicier but may affect crispiness. Trim excess fat and reduce baking time to 10-12 minutes to avoid overcooking. Thighs work well if you prefer a more forgiving texture, but breasts give that classic tender bite.
Why did my nuggets turn out soggy instead of crispy?
Soggy nuggets usually mean one of three things: the chicken wasn't dry enough before breading, the oven temperature wasn't high enough (425°F is key), or you overcrowded the baking sheet. For extra crispiness, bake on a wire rack over a baking sheet and avoid stacking.
How do I store leftovers to keep them crispy?
Store nuggets in a single layer on a wire rack in the fridge for up to 3 days—this prevents moisture buildup. Reheat in a 400°F oven for 5-7 minutes or air fry at 375°F for 3-4 minutes. For freezing, bake first, then store in an airtight container for up to 2 months.
Can I make these nuggets ahead of time?
Prep the breaded nuggets up to 24 hours ahead and refrigerate uncovered on a wire rack. Bake straight from the fridge at 425°F for 15-18 minutes—they'll still be crispy. For meal prep, freeze unbaked nuggets on a tray, then transfer to a bag for up to 3 months.
What's the best way to make these kid-friendly?
Cut nuggets into smaller ½-inch pieces for little hands. Serve with mild dipping sauces like honey mustard or ketchup. For picky eaters, reduce garlic powder to ½ teaspoon and add ¼ teaspoon onion powder for a milder flavor. Warm nuggets before serving—they're more appealing fresh from the oven!