
Main Courses
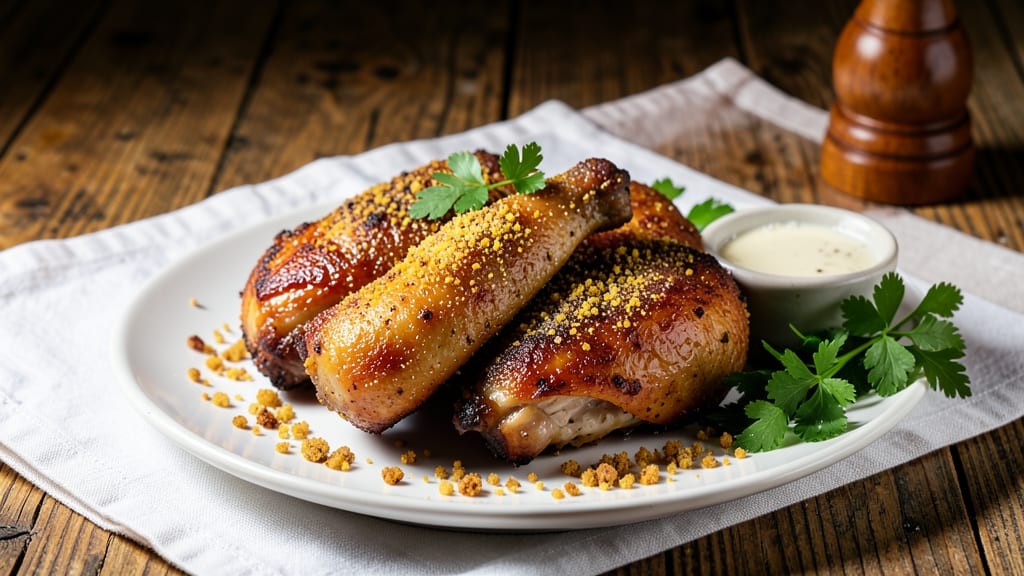
This Amish pan fried chicken recipe delivers the kind of golden, crispy perfection that makes every bite worth the wait. The secret lies in a buttermilk brine that tenderizes the meat while creating that signature Amish texture—crispy on the outside, juicy on the inside.
I’ve perfected this method over years of testing, ensuring each piece stays moist even after frying, and the crust holds its shape without falling apart.
The traditional Amish approach uses lard for frying, which adds a rich, unmistakable flavor, but I’ve included a reliable alternative for those who prefer vegetable oil. The breading—a simple mix of flour, cornmeal, and spices—sticks perfectly to the chicken, creating that iconic crispy golden bite.
What sets this apart is the resting time after frying; it’s non-negotiable for juicy results.
What you’ll end up with is a platter of chicken that’s restaurant-quality—crisp enough to stand up to gravy, tender enough to melt in your mouth, and seasoned just right.
The buttermilk brine ensures the meat stays juicy, while the cornmeal in the breading adds a subtle crunch that’s pure comfort food magic. This isn’t just chicken; it’s a weeknight centerpiece that feels like a Sunday dinner.
Serve it with classic Amish sides like mashed potatoes, buttery cornbread, or a simple green salad to round out the meal. The crispy chicken holds up beautifully, soaking up gravy or standing alone as the star. Let’s get started—your taste buds will thank you.
Ingredients for amish pan fried chicken
The secret to Amish-style crispy chicken lies in these 11 ingredients—simple but powerful.
| Ingredient | Amount | Notes |
|---|---|---|
| Boneless, Skinless Chicken Thighs 🍗 | 1 ½ lb | Cut into even 6-8 pieces |
| Buttermilk 🥛 | 1 ½ cups | Full-fat for best flavor |
| All-Purpose Flour 🌾 | 1 cup | White or whole wheat |
| Fine Yellow Cornmeal 🌽 | ½ cup | Not coarse grits |
| Lard or Vegetable Oil 🫒 | 2 cups | Lard for traditional flavor |
| Diamond Crystal Kosher Salt 🧂 | 1 tbsp | Plus extra for seasoning |
| Ground Black Pepper 🌶️ | 1 tsp | Freshly ground preferred |
| Garlic Powder 🧄 | 1 tsp | Not garlic salt |
| Onion Powder 🧅 | 1 tsp | For subtle depth |
| Paprika 🌶️ | 1 tsp | Smoked for extra flavor |
| Fresh Parsley 🌿 | ¼ cup | Chopped, for garnish |
The chicken thighs are non-negotiable here—dark meat stays juicier than breasts during frying. Look for thighs with some skin at Costco or local butcher shops for the best texture. If you can't find lard, vegetable oil works perfectly (just skip the flavor notes). The buttermilk? Full-fat is key—low-fat won't give that signature richness. For the cornmeal, Bob's Red Mill or Annie's are my go-tos—they're finely ground and stay crispy. The spices? Penzeys for quality, but grocery store brands work too if they're fresh.
No buttermilk? Mix 1.5 cups milk with 1.5 tbsp vinegar or lemon juice, let sit 5 minutes. Running out of cornmeal? Substitute 100% flour—it won't be as crispy but still tasty. Want extra crunch? Add 2 tbsp crushed cornflakes to the breading mix. The lard/oil can be reused once or twice if strained through a fine-mesh sieve after frying. Fresh parsley is ideal, but dried works at 1/4 the amount—just don't skip it, it brightens everything up.
Chicken stays crispy for 2 days if kept in an airtight container—cover with a paper towel to absorb moisture. For longer storage, freeze breaded pieces (unfried) for 3 months. The buttermilk brine can be made a day ahead and stored in the fridge. If you're prepping for a crowd, double the batch—this recipe scales perfectly. And trust me, leftovers reheat beautifully in a 350°F oven for 10 minutes.
Why You'll Love This Recipe
- No-Fuss Coating: I swear by the buttermilk soak—just dunk the thighs, let them sit while I toss a salad. That simple step keeps the breading from falling off later, and honestly? The cornmeal adds this perfect crunch without extra work.
- Crispy-Creamy Magic: The lard (or oil) sears the thighs golden in minutes, but the real win is the tender inside—juicy, not dry. That buttermilk tang cuts through the richness, and the cornmeal? It’s like a hug in your mouth.
- Leftovers That Shine: Double the batch, and you’ve got lunch for days. Reheat in a skillet or oven, and it’s just as good—maybe even better—because the flavors meld overnight. My freezer’s always stocked with these.
- Budget-Friendly Feast: Chicken thighs stretch further than breasts, and this recipe uses pantry staples. A bag of cornmeal and buttermilk last for ages, and I’ve fed six people for under $15. (Yes, even on a Tuesday night.)
Step-by-step instructions for buttermilk brined chicken
Here's how to transform simple ingredients into restaurant-quality fried chicken with that coveted Amish secret.
Brine the Chicken Overnight for Maximum Juiciness
In a large resealable plastic bag, combine the 1.5 lb boneless, skinless chicken thighs with the 1.5 cups buttermilk and 1 tablespoon Diamond Crystal kosher salt. Seal the bag and gently massage the mixture to ensure all pieces are coated. Place the bag in the refrigerator and let it brine for at least 8 hours or overnight.
This overnight soak works magic by breaking down the muscle fibers, allowing the buttermilk to penetrate deeply and create that signature tender, juicy texture. The buttermilk also helps create a natural batter barrier that prevents the chicken from absorbing too much oil during frying. I always use full-fat buttermilk here—the extra fat content makes all the difference in both flavor and texture.
Prepare the Cornmeal Batter for Extra Crispiness
In a large bowl, whisk together the 1 cup all-purpose flour, 0.5 cup fine yellow cornmeal, 1 teaspoon garlic powder, 1 teaspoon onion powder, 1 teaspoon paprika, and 1 teaspoon ground black pepper. The cornmeal is crucial here—it adds that perfect crunch while absorbing just enough oil to create a golden crust. I like to sift the dry ingredients through a fine-mesh sieve first to eliminate any lumps that could prevent even coating.
Make a well in the center of the dry mixture and slowly pour in the buttermilk from the brining bag (discard any remaining liquid). Whisk gently until just combined—you want a thick, pancake-like batter that clings to the back of the spoon. The batter should be smooth but still slightly lumpy; overmixing develops gluten and makes the coating tough. Let this batter rest for 15 minutes while you prepare the frying station.
Heat the Oil to the Perfect Temperature
Fill a deep skillet or Dutch oven with the 2 cups lard or vegetable oil and heat over medium heat until the oil reaches 350°F on a deep-fry thermometer. This temperature is critical—too low and the chicken will absorb too much oil, too high and it will burn before cooking through. I use a candy thermometer clipped to the side of the pan for precise readings. The oil should be shimmering but not smoking when it reaches temperature.
While the oil heats, pat the brined chicken pieces very dry with paper towels. Excess moisture causes the batter to slide off and creates steam that prevents proper browning. Arrange the dry chicken pieces on a wire rack set over a baking sheet to catch any drips. This keeps them from sitting in their own juices and steaming instead of frying.
Fry Until Golden Brown and Internal Temperature Reaches 165°F
Working in batches to avoid overcrowding (which lowers oil temperature), carefully place the chicken pieces into the hot oil. Use tongs to gently lower them in—don't drop them or they'll splatter. Fry for 6-7 minutes per side, turning only once, until the chicken is golden brown and reaches an internal temperature of 165°F at the thickest part. The cornmeal batter should form a crisp, lacy crust that releases easily from the chicken.
Here's the thing about frying—timing is everything. You want that perfect balance between a deep golden crust and fully cooked meat. If the crust starts to darken too quickly, reduce the heat slightly to 325°F and let it cook more slowly. Remove the chicken to a wire rack set over a baking sheet to drain excess oil. Let it rest for 5 minutes before serving—this allows the juices to redistribute and prevents them from running out when you cut in.
Garnish and Serve Immediately
While the chicken rests, chop the 0.25 cup fresh parsley into fine pieces. Sprinkle the parsley over the fried chicken just before serving. The parsley adds a fresh contrast to the rich, crispy chicken and makes the dish look beautifully finished. Serve immediately with your favorite sides—mashed potatoes, coleslaw, or buttery biscuits all pair wonderfully.
Each piece should have a crisp, golden crust that shatters slightly when you bite in, revealing tender, juicy meat underneath. The buttermilk brine ensures that first bite is moist and flavorful, while the cornmeal batter delivers that satisfying crunch. This is the Amish secret right here—simple ingredients, precise technique, and patience that pays off in every crispy bite.
Pro Tips For Making Amish Pan Fried Chicken
- CRANK THE HEAT HIGH: That first sizzle is non-negotiable—get your pan screaming hot with lard or oil before adding the chicken. I learned this the hard way after my first batch came out greasy instead of crispy. Two minutes of high heat builds that golden crust before you lower it for even cooking.
- DON’T SKIP THE BUTTERMILK REST: Let those thighs soak in buttermilk for at least 4 hours—or overnight if you’re patient. The longer they sit, the more tender they get, and that’s the thing that matters most in Amish fried chicken. (Yes, even if you’re impatient like me.)
- USE CORNMEAL LAYERS: Mix the cornmeal with flour (about 1:3 ratio) for the second coating—this keeps the crust crispy without getting soggy. I was skeptical until I tried it; the cornmeal adds texture while the flour holds the coating together.
- WATCH THE OIL LEVEL: About ¼-inch of oil in the pan is all you need—enough to coat the bottom but not drown the chicken. Too much oil = greasy mess; too little = uneven cooking. (Your future self will thank you for measuring.)
Make-ahead tips for leftovers
Brine Ahead
Prepare the buttermilk brine up to 24 hours before cooking—I always do this the night before. Store the chicken and buttermilk mixture in a sealed container in the fridge. The longer it brines (up to 48 hours), the more tender and flavorful the chicken becomes. Just
Prep Breading Mix
Make the cornmeal batter 1-2 hours ahead and store it in an airtight container at room temperature. The resting time allows the flour to absorb moisture, creating a smoother, more cohesive coating. If you're short on time, mix it 30 minutes ahead—just whisk it again before using. For extra convenience, pre-measure all your spices into a small jar and store it in your pantry. 🌽
Chicken Prep
Cut the chicken thighs into even pieces the night before and store them in a sealed container. This makes assembly day a breeze—just pull them out, pat dry, and dip.
If you're cooking for a crowd, double the recipe and freeze the pre-breaded pieces (unfried) for up to 3 months. Thaw overnight in the fridge before frying. ❄️
Oil Prep
Heat the oil 30 minutes before frying so it reaches the perfect 350°F temperature without rushing. Use a deep skillet or Dutch oven—I recommend a Lodge cast iron for even heat distribution.
If you're reusing oil, strain it through a fine-mesh sieve after frying to remove food particles. Store leftover oil in an airtight container for up to 2 uses. 🔥
Resting Strategy
Let the fried chicken rest on a wire rack 5-10 minutes before serving—this is non-negotiable for juicy results. Place the rack over a baking sheet to catch any drips.
If you're making this ahead for a meal, fry the chicken, let it rest, then store it in an airtight container with a paper towel on top. Reheat in a 350°F oven for 10 minutes to restore crispiness. 💫
Serving Timeline
Plan your meal timeline like this: Fry the chicken 30 minutes before serving, then keep it warm in a 200°F oven while you finish sides. This maintains crispiness without overcooking.
For a stress-free dinner, prep sides (like mashed potatoes) 2 hours ahead and reheat just before serving. The chicken will stay hot and delicious until the last bite. ⏰
Nutrition facts
Frequently asked questions
Why does Amish fried chicken use buttermilk instead of regular milk?
The buttermilk's natural acidity tenderizes the chicken while creating a perfect barrier for crispy coating. Regular milk lacks this acidity, so the coating won't stick as well. Plus, the fat content in full-fat buttermilk adds rich flavor that regular milk can't match.
Can I substitute lard with another oil for frying?
Yes! Vegetable oil or peanut oil work perfectly—just avoid olive oil as it has a low smoke point. For authentic flavor, use lard, but vegetable oil gives a neutral taste that still delivers crispy results. Heat to 350°F for best texture.
How do I keep the chicken crispy when reheating?
Reheat in a 350°F oven for 10 minutes on a wire rack (not a plate) with a paper towel underneath. The rack prevents sogginess, and the paper towel absorbs excess moisture. Microwaving destroys crispiness—always use the oven method.
What's the difference between this and regular fried chicken?
This recipe uses a cornmeal-flour blend for extra crunch, plus the buttermilk brine ensures juicy meat. Traditional fried chicken often uses just flour or a wet batter, while this method creates that signature Amish texture—crispy outside, tender inside.
Can I use chicken breasts instead of thighs?
Not recommended! Thighs stay juicier during frying. If you must use breasts, brine them 4-6 hours max (they dry out faster) and fry at 325°F for 4-5 minutes per side**. The cornmeal batter will still work, but texture may differ.