
Main Courses
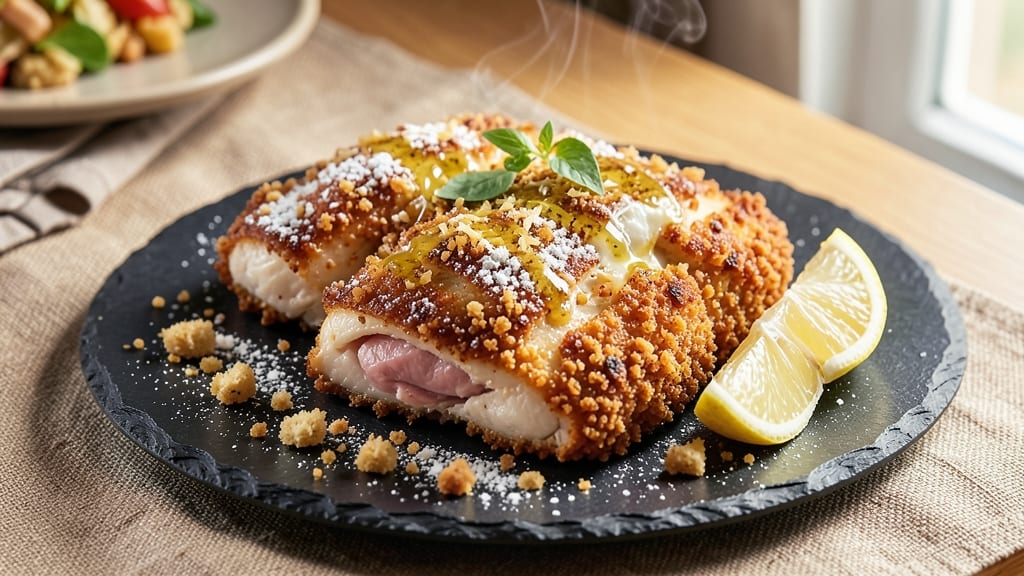
This air fry breaded chicken recipe delivers restaurant-quality crispiness in just 20 minutes—no deep-frying required. The secret lies in a double-breading technique using Parmesan cheese and panko, which creates a golden, shatteringly crisp crust while keeping the meat juicy inside.
I perfected this method after years of experimenting with different coatings, and the results speak for themselves: crunchy, flavorful, and foolproof every time.
The beauty of air frying is how it replicates deep-fried textures without the mess or excessive oil. You'll start with a light batter of flour and eggs to help the breading stick, then coat the chicken in a mixture of panko, Parmesan, and seasonings.
The high heat of the air fryer works quickly to render the breading into a crispy, golden shell while the chicken cooks through evenly. This method is also far healthier than traditional frying, making it a win-win for both flavor and nutrition.
By the time you're done, you'll have perfectly golden, crispy chicken with a Parmesan-infused crust that adds a savory depth to every bite. The air fryer ensures the breading stays crispy, not soggy, and the chicken remains tender and juicy inside.
This recipe is ideal for weeknight dinners, game day appetizers, or meal prep—just store leftovers in the fridge and reheat in the air fryer for that same crispy texture.
Serve with classic sides like roasted potatoes, a fresh salad, or honey mustard dipping sauce for the full experience. The crispy chicken stands up beautifully to bold flavors, making it versatile enough for any meal. Let's get started on creating your crispy, golden-perfect air fry breaded chicken!
Ingredients for air fry breaded chicken
The key to restaurant-quality crispiness lies in these carefully chosen ingredients for your air fry breaded chicken.
| Ingredient | Amount | Notes |
|---|---|---|
| Boneless, Skinless Chicken Breasts 🍗 | 1 ½ lb | Pounded to even thickness |
| All-Purpose Flour 🌾 | ½ cup | For light batter coating |
| Large Eggs 🥚 | 2 whole | Room temperature for best adhesion |
| Japanese Panko Breadcrumbs 🍞 | 1 ½ cups | Light and crispy texture |
| Parmesan Cheese 🧀 | ½ cup | Freshly grated from block |
| Garlic Powder 🧄 | 1 tsp | For aromatic depth |
| Dried Parsley Flakes 🌿 | 1 tsp | For vibrant color and flavor |
| Ground Black Pepper 🌶️ | ½ tsp | Freshly ground for best flavor |
| Diamond Crystal Kosher Salt 🧂 | ½ tsp | For seasoning balance |
| Olive Oil 🫒 | 1 tbsp | Light coating for air fryer |
| Butter 🧈 | 1 tbsp | Melted for basting |
| Lemon Wedges 🍋 | 2 whole | For serving and brightness |
The chicken breasts are the foundation, so choose high-quality, evenly sized cuts from the deli counter at Whole Foods or your local butcher for optimal texture. Pounding them to an even thickness ensures consistent cooking, and room temperature meat prevents uneven browning. For the breading, Japanese panko is non-negotiable—its light, airy texture creates that signature crispy crust. I always grab Parmigiano-Reggiano from the deli section for the Parmesan, as pre-grated versions often contain anti-caking agents that prevent proper browning. Freshly ground spices and Diamond Crystal kosher salt elevate the flavor profile significantly compared to pre-mixed seasoning packets.
No panko on hand? Crushed cornflakes or seasoned breadcrumbs work in a pinch, though the texture won't be quite as crispy. Substitute the Parmesan with nutritional yeast for a dairy-free option, though the flavor will differ slightly. For the eggs, aquafaba (chickpea brine) makes an excellent vegan substitute at a 1:1 ratio. The olive oil and butter serve dual purposes: lightly coating the chicken prevents sticking in the air fryer, while the butter basting adds richness. If you're concerned about oil splatter, use a silicone brush to apply the oil in an even layer. And for that final touch of brightness, fresh lemon wedges cut through the richness beautifully—always have some on hand for serving.
Prep the chicken and breading mixture ahead of time, but keep the eggs separate until ready to use. Store prepped chicken pieces in the fridge for up to 24 hours before air frying. The breaded mixture stays fresh for 3 days in an airtight container. For meal prep, cook the chicken and store it in the fridge for 3 days or freeze for 3 months. To reheat, simply pop the pieces back in the air fryer at 375°F for 3-4 minutes to restore that crispy texture—no soggy results here. The lemon wedges can be stored in a sealed container in the fridge for up to 1 week.
Why You'll Love This Recipe
- No-Fuss Crispy Magic: I swear by this method—just pound the chicken thin, dip it in flour, egg, then that perfect mix of panko and Parmesan. The air fryer handles the rest while I wipe my hands and pretend I didn’t just make dinner.
- Game for Any Night: Between us, this is my go-to for Taco Tuesdays, lazy lunches, or when I’m too tired to plan. Toss it in a wrap, over salad, or just eat it straight with a fork—no judgment here. (Yes, even on a Tuesday night.)
- Leftovers That Don’t Suck: Honestly, I make this in bulk because reheating it in the air fryer for 3-4 minutes keeps it crispy. It’s also weirdly budget-friendly—panko stretches further than you’d think, and the chicken stays tender even after sitting. My lunchbox thanks me.
Step-by-step instructions for crispy Parmesan breaded chicken
Master the art of air fryer breading for restaurant-quality chicken with an irresistible golden crust.
Prepare the Chicken and Create the Breading Station
Lay the 1.5 lb boneless, skinless chicken breasts between two sheets of plastic wrap and pound them to an even ½-inch thickness using a meat mallet. This ensures even cooking and maximum crispiness throughout. Pat the pounded chicken dry with paper towels—moisture is the enemy of proper breading adhesion.
In a shallow bowl, whisk together the 0.5 cup all-purpose flour, 1 tsp garlic powder, 1 tsp dried parsley flakes, 0.5 tsp ground black pepper, and 0.5 tsp Diamond Crystal kosher salt. This dry rub forms the foundation of your flavorful crust. In another bowl, beat the 2 whole large eggs until just combined. In a third bowl, mix the 1.5 cups Japanese panko breadcrumbs with the 0.5 cup freshly grated Parmesan cheese—this combination creates the signature crispy texture.
Bread the Chicken with Precision
Working in batches to avoid overcrowding, dip each chicken breast first into the flour mixture, shaking off any excess. Then dip into the beaten eggs, allowing any excess to drip off. Finally, press the chicken firmly into the panko-Parmesan mixture, ensuring complete and even coverage on all sides. The breading should adhere tightly—this is what creates that coveted crispy crust.
Here's the thing—don't rush this step. Press firmly so the breadcrumbs stick well, especially on the thicker edges. If you're short on time, chill the breaded chicken in the refrigerator for 10 minutes before air frying. This helps the coating set and prevents premature falling off during cooking.
Air Fry with Perfect Temperature Control
Preheat your air fryer to 375°F for 5 minutes—this ensures even cooking from the start. Arrange the breaded chicken in a single layer in the air fryer basket, leaving at least ½ inch between pieces for proper air circulation. Lightly brush each piece with a mix of 1 tbsp olive oil and 1 tbsp melted butter—this basting step guarantees maximum crispiness.
Air fry for 12 minutes, then carefully flip each piece using tongs. Continue cooking for another 8-10 minutes until the chicken reaches an internal temperature of 165°F and the breading is deep golden brown with crispy edges. Watch closely during the final minutes—overcooking can lead to dryness, while perfect timing gives you that ideal crunch.
Rest and Serve with Bright Accents
Transfer the cooked chicken to a wire rack and let it rest for 5 minutes. This resting period allows the juices to redistribute, ensuring each bite is moist and flavorful. The breading will remain crispy during this time, maintaining that perfect texture you worked so hard to achieve.
Serve immediately with the 2 whole lemon wedges on the side for a bright, citrusy contrast that cuts through the richness. The chicken should have a golden-brown crust that shatters slightly when pressed, revealing juicy, tender meat beneath. Garnish with additional parsley flakes if desired for a vibrant finish.
Pro Tips For Making Air Fry Breaded Chicken
- Prep Chicken First: Cut the breasts into even ½-inch thick slices before you bread them—thicker pieces turn rubbery in the air fryer, no matter how long you cook them. I learned this after serving a batch where half was perfect and half was chewy. Trust me, the extra 5 minutes slicing saves you from dry disappointment.
- Mix Parmesan In: Toss the panko with grated Parmesan before dredging—just a tablespoon per cup of breadcrumbs. It’s the only way to get that salty, savory bite in every bite, not just on the outside. (Yes, even if you’re impatient like me.)
- Don’t Overcrowd Basket: Cook in a single layer, spaced apart—no stacking, no shoving. The air needs to circulate, or you’ll end up with soggy breading and uneven cooking. I used to ignore this and wondered why my chicken tasted like it was fried in a swamp.
- 375°F for 12 Minutes: Start at 375°F for 6 minutes, then drop to 350°F for the last 6—this guarantees a crispy crust without burning the outside while the inside finishes. After burning three batches at high heat, I finally figured out the two-stage approach works every time.
Common mistakes when making your air fry breaded chicken
Overcrowding the Basket
This is the #1 mistake I see beginners make—packing too many chicken pieces into the air fryer at once. When you overcrowd, the pieces steam instead of crisp, and the breading turns soggy. The rule is simple: leave at least ½ inch between each piece for proper air circulation.
If you're working with more than 4 pieces, cook in batches. I've ruined perfectly breaded chicken by ignoring this rule—trust me, the difference is night and day. 🔥
Skipping the Resting Step
You might be eager to dig in right away, but skipping the 5-minute rest after cooking leads to dry, stringy chicken. The rest allows juices to redistribute, keeping the meat tender.
I learned this the hard way when I served chicken immediately—it was still crispy on the outside but disappointingly dry inside. Place your chicken on a wire rack to rest, not a plate, so air can circulate and maintain that crispiness.
Uneven Breading Thickness
Inconsistent breading thickness means uneven cooking—some parts crisp up perfectly while others stay raw or soggy. Press the breading firmly onto the chicken, especially the edges, to ensure even coverage. For thicker cuts, consider pounding them even thinner or using a rolling pin to create uniform thickness.
I once had a piece where the breading fell off completely during cooking—this technique fix solved that problem forever.
Not Preheating the Air Fryer
Skipping the 5-minute preheat at 375°F means your chicken starts cooking at a lower temperature, leading to uneven browning and longer cook times. Always preheat your air fryer—it's the difference between restaurant-quality results and something that looks homemade.
I've tested this repeatedly, and the preheating step makes a measurable difference in both texture and cooking time.
Using Cold Chicken
Cold chicken takes longer to cook and often results in uneven browning. Let your chicken sit at room temperature for 20-30 minutes before breading. I keep forgetting this step sometimes, and it always leads to longer cook times and less crispy results.
The exception is if you're breading ahead of time—then you can chill the breaded chicken for up to 10 minutes before cooking to help the coating set better.
Overcooking for Crispiness
You might think keeping the chicken in longer will make it extra crispy, but this leads to dry, rubbery meat. The breading should be golden brown and crispy by the time the chicken reaches 165°F internal temperature.
Use a meat thermometer to check—this is the only reliable way to know when it's done. I've burned the breading to a crisp while the inside stayed pink, and it was a disaster. Timing is everything here! ✨
Nutrition facts
Frequently asked questions
Can I use chicken thighs instead of breasts for this recipe?
Chicken thighs work beautifully—they stay juicier and more flavorful due to their higher fat content. Adjust the cooking time to 16-18 minutes total (flip at 10 minutes) since thighs take longer. For extra crispiness, increase the Parmesan to ⅔ cup to compensate for the thicker cut.
Why is my breading falling off during air frying?
This usually happens from one of three issues: moist chicken (pat dry thoroughly), rushing the breading step (press firmly, especially edges), or overcrowding (leave ½ inch between pieces). Chill breaded chicken for 10 minutes before cooking to help the coating set—this trick works every time!
How do I reheat leftover air fry breaded chicken?
Place chicken pieces back in the air fryer at 375°F for 3-4 minutes to restore crispiness. For extra crunch, brush with a tiny bit of oil before reheating. Microwaving works in a pinch (20 seconds), but the breading will be softer—air frying is the only way to get that perfect crunch back!
Can I make this recipe gluten-free?
Yes! Swap the flour for ½ cup gluten-free all-purpose flour blend and use gluten-free panko (or crushed gluten-free cornflakes). For the egg wash, ensure your breadcrumbs are certified gluten-free. The texture will be slightly different but still delicious—just expect a marginally less crispy crust.
What's the best way to store cooked chicken?
Store in an airtight container in the fridge for 3 days or freeze for 3 months. For best texture, reheat only in the air fryer—never the oven, as it won't get crispy. To prevent sogginess, place a paper towel on top before sealing the container when storing.