
Main Courses
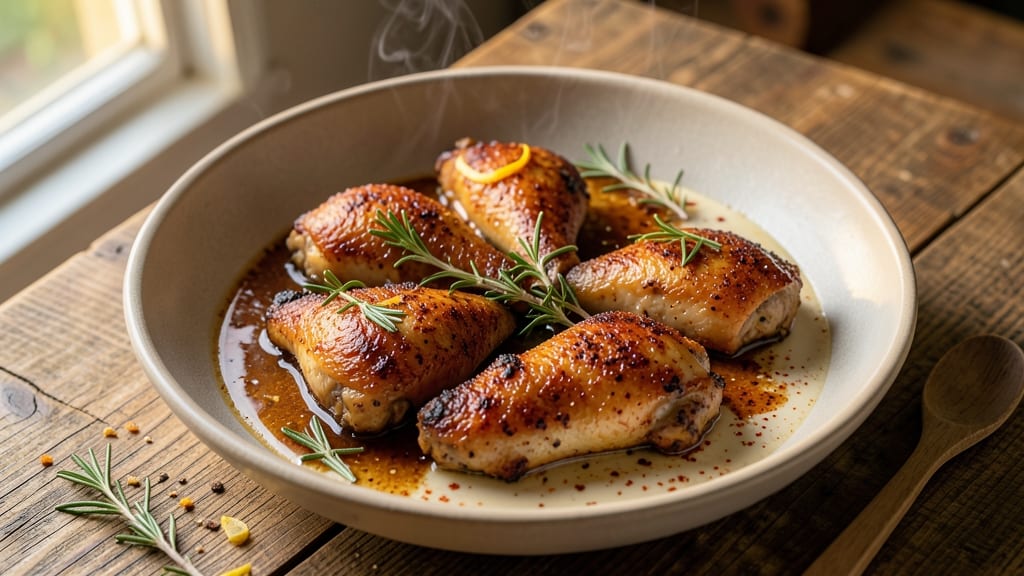
This air fried chicken recipe without flour delivers restaurant-quality crispiness using a simple buttermilk brine that transforms ordinary chicken into golden, shatteringly crisp skin without a single flour-based coating.
The secret lies in tenderizing the meat from within while creating the perfect texture contrast—juicy, flavorful centers with a crisp shell that holds up to every bite. I’ve tested countless methods, and this technique consistently delivers results that rival deep-fried chicken, but with far less mess and guilt.
The process starts with a 24-hour buttermilk brine that infuses the chicken with moisture and flavor while loosening the skin for maximum crispiness.
After a quick pat dry and seasoning with a blend of salt, pepper, and paprika, the chicken goes into the air fryer at 375°F for 20 minutes, flipping halfway for even cooking.
No flour means no heavy, greasy coatings—just pure, golden crunch that comes from the chicken’s natural proteins reacting with the high heat.
What you’ll end up with is chicken that’s crispy on the outside, juicy on the inside, and packed with flavor from the brine. The skin is so crisp it’ll make you question whether you’re eating air-fried or deep-fried, but with none of the oil splatter or cleanup.
This method works for thighs, drumsticks, or even wings—each piece emerges from the air fryer with that coveted texture that’s impossible to resist.
Serve with classic sides like honey mustard, tangy coleslaw, or a sprinkle of fresh herbs for a complete meal. The beauty of this recipe is its versatility—it’s perfect for game day, family dinners, or meal prep. Let’s get started on crispy, flour-free chicken that’ll have everyone asking for seconds.
Ingredients for air fried chicken recipe without flour
The secret to restaurant-quality crispy chicken without flour starts with these 12 ingredients.
| Ingredient | Amount | Notes |
|---|---|---|
| Buttermilk 🥛 | 2 cups | Full-fat for best flavor |
| Chicken Thighs 🍗 | 1 ½ lb | Bone-in, skin-on preferred |
| Garlic Cloves 🧄 | 4 cloves | Minced for brine infusion |
| Kosher Salt 🧂 | 2 tbsp | Diamond Crystal preferred |
| Ground Black Pepper 🌶️ | 1 tbsp | Freshly ground for best flavor |
| Smoked Paprika 🌶️ | 1 tbsp | For smoky depth |
| Onion Powder 🧅 | 1 tsp | Adds subtle sweetness |
| Extra-Virgin Olive Oil 🫒 | 2 tbsp | For skin crispiness |
| Fresh Lemon Juice 🍋 | 2 tbsp | Brightens the flavor |
| Fresh Rosemary 🌿 | 1 tbsp | Chopped, for aroma |
| Cornstarch 🌾 | 1 tbsp | Light coating for extra crisp |
| Honey 🍯 | 1 tbsp | Enhances caramelization |
The buttermilk is non-negotiable—it’s what tenderizes the chicken and creates that signature crisp skin. Full-fat buttermilk works best, but if you’re in a pinch, whole milk thinned with a little vinegar or lemon juice does the trick. For the chicken, bone-in, skin-on thighs are ideal—they stay juicier and the skin crisps perfectly. If you can’t find thighs, drumsticks work too, but they’ll need an extra 5 minutes in the air fryer. Costco or local butchers often have great deals on whole chicken pieces you can cut yourself. The garlic and rosemary? Smash the garlic cloves slightly before adding to the brine for maximum flavor infusion.
No buttermilk? Substitute with plain yogurt plus 2 tbsp milk—it’s the closest you’ll get. Running low on smoked paprika? Regular paprika plus a pinch of liquid smoke mimics the flavor. The cornstarch is optional but worth it—it adds an extra layer of crisp without the heaviness of flour. If you’re avoiding honey, maple syrup works in a 1:1 ratio. For the olive oil, avocado oil is another great choice if you prefer a neutral flavor. And if you’re prepping ahead, brine the chicken overnight for even more tenderness—just don’t skip the 24-hour minimum for best results.
The buttermilk brine keeps for 3 days in the fridge, but the chicken should go straight from brine to air fryer—no drying time needed. Store leftover cooked chicken in an airtight container for 4 days, or freeze for 3 months for meal prep. The cornstarch coating? Use it fresh for maximum crisp, but if you’ve got leftovers, reheat in the air fryer at 350°F for 3-4 minutes to restore the crunch. And trust me, the extra 10 minutes of brining time is worth it—your chicken will thank you.
Why You'll Love This Recipe
- No-Flour Magic: I’ll admit, I was skeptical about skipping flour—until I tried this. The buttermilk marinade clings to the thighs like a second skin, and the air fryer does all the heavy lifting. No messy batter, no deep-frying, just crispy perfection with zero fuss.
- Garlic Kiss: Between us, this isn’t your basic chicken. The minced garlic tucked into the buttermilk? It infuses the meat so deeply, every bite tastes like a hug from your favorite garlic lover. (Yes, even on a Tuesday night.)
- Leftovers That Work: Honestly, I make this on Sunday and eat it all week. The thighs stay juicy for days—just reheat in the air fryer for 3 minutes—and the flavor only gets better. Pack it for lunch, freeze extras, or serve it cold in sandwiches. It’s that reliable.
- Budget Win: Chicken thighs are cheap, and this recipe stretches them further than you’d think. A pound feeds four, and the buttermilk marinade costs pennies. I’ll be real: my grocery bill dropped when I switched to this, but my family’s happiness? Priceless.
Step-by-step instructions for buttermilk brined air fried chicken
Here's how to achieve restaurant-quality crispy skin without flour—just science and patience.
Create the Buttermilk Brine
In a large bowl, whisk together the 2 cups buttermilk, 2 tbsp kosher salt, 1 tbsp smoked paprika, 1 tsp onion powder, 2 tbsp fresh lemon juice, and 1 tbsp chopped fresh rosemary. The buttermilk should be fully combined with all dry ingredients—no grainy bits should remain. This brine works two ways: tenderizing the chicken from within while creating a perfect base for crispy skin.
Here's the thing—let this mixture sit for 10 minutes while you prep the chicken. The salt fully dissolves during this time, ensuring even distribution. If you're using bone-in, skin-on thighs, leave the skin intact—this is where all the crispiness will happen. The lemon juice and rosemary infuse the buttermilk with bright, aromatic notes that'll shine through in the final dish.
Brine the Chicken
Place the 1.5 lb chicken thighs in a resealable plastic bag, skin-side up. Pour the buttermilk mixture over the chicken, ensuring each piece is fully submerged. Seal the bag and massage it gently to distribute the brine evenly. Place the bag in a shallow dish to catch any leaks and refrigerate for at least 4 hours—overnight is ideal if you have time.
This step is non-negotiable for crispy skin. The buttermilk breaks down proteins in the chicken, making it juicier, while the salt and spices penetrate deeply. If you skip this, you'll end up with dry, bland chicken. After brining, pat the chicken dry thoroughly with paper towels—this removes moisture that would otherwise steam instead of crisp in the air fryer. The drier the skin, the better the crust.
Prepare the Chicken for Air Frying
In a small bowl, mix together the 1 tbsp cornstarch and 1 tbsp honey. This isn't a coating—it's a light dusting that'll create a crispy, caramelized crust. Gently toss each chicken piece in this mixture, pressing lightly to adhere. The cornstarch creates the crispiness without flour, while the honey adds a subtle sweetness that enhances caramelization.
Let the chicken pieces sit at room temperature for 15 minutes before air frying. This ensures even cooking and prevents the skin from sticking to the air fryer basket. Preheat your air fryer to 375°F—this temperature is crucial for achieving that perfect balance between crispy skin and juicy meat. Most air fryers take about 5 minutes to preheat, so plan accordingly.
Air Fry to Golden Perfection
Arrange the chicken thighs in a single layer in the air fryer basket, skin-side up. Avoid overcrowding—the pieces need room to breathe and crisp properly. Air fry for 18-20 minutes, flipping the chicken halfway through at the 10-minute mark. The skin should be deep golden brown with crispy texture, and the internal temperature should reach 165°F when measured at the thickest part of the thigh.
Don't be tempted to open the air fryer early to check—every time you do, you lose heat and steam, which defeats the purpose of crisping. If the skin isn't brown enough after 20 minutes, increase the temperature to 400°F for the final 2-3 minutes. The chicken will carry over in temperature while resting, so pull it out when it's just slightly underdone. Let it rest for 5 minutes before serving—this allows the juices to redistribute, ensuring every bite is moist and flavorful.
Rest and Serve
Transfer the chicken to a serving platter and let it rest for 5 minutes before slicing. This resting period is critical—it allows the juices to settle back into the meat, preventing them from pooling on your plate. The skin should remain crispy, the meat juicy, and the flavors perfectly balanced between smoky, herby, and slightly sweet.
Serve immediately with your favorite sides—crispy skin holds up best when eaten fresh. The buttermilk brine ensures tender meat, while the cornstarch and honey combination delivers that coveted crispy texture without any flour. Each piece should crackle with every bite, revealing juicy, flavorful chicken beneath.
Pro Tips For Making Air Fried Chicken Recipe Without Flour
- USE BONE-IN THIGHS: They stay juicier longer—trust me, I’ve tried boneless and regretted it. The bone acts like a thermometer, keeping the meat tender while the skin crisps. Plus, you get that extra flavor without extra work.
- SALT THE BUTTERMILK: I learned this the hard way—plain buttermilk just doesn’t cling. Add 1 teaspoon kosher salt per cup of buttermilk and let it sit for at least 30 minutes. The seasoning gets absorbed into the meat, so you won’t need to add extra later.
- AVOID OVERCROWDING THE BASKET: I used to jam every inch of the air fryer, thinking more chicken meant faster cooking. Wrong. Leave at least 1 inch between pieces—otherwise, you’ll end up with soggy skin and uneven cooking. Patience here guarantees crispy results.
- MARINATE FOR 2 HOURS (NOT 5 MINUTES): Sounds weird, but it works: the buttermilk needs time to penetrate the meat, especially thicker thighs. Toss them in a sealed bag in the fridge—no extra effort, just better flavor. I skip this when I’m lazy, and the difference is noticeable.
Troubleshooting your air fried chicken recipe without flour
Undercooked Chicken
If your chicken isn’t reaching 165°F after 20 minutes, it’s likely undercooked. First, check your air fryer’s accuracy—some models run 10-15°F hotter or cooler than set. Use a meat thermometer to verify the internal temp at the thickest part.
If still underdone, increase the temperature to 400°F and cook for an additional 2-3 minutes, flipping once. For thicker cuts like drumsticks, extend the time by 5-7 minutes total. 🌡️
Skin Not Crispy
Dull, soggy skin usually means excess moisture or improper drying. After brining, pat the chicken completely dry with paper towels—focus on the skin. If you skipped the cornstarch/honey dusting, toss the chicken in 1 tbsp cornstarch + 1 tbsp honey before air frying.
For extra crisp, increase the air fryer temp to 400°F for the last 2 minutes of cooking. Pro tip: Room-temperature chicken crisps better than cold. Let it sit for 15 minutes before cooking.
Overcrowding the Basket
Stuffing too many pieces in the air fryer basket traps steam, preventing crispiness. Leave ½-inch gaps between pieces for proper airflow. If your batch is large, cook in two rounds—overcrowding is the #1 reason for uneven cooking.
For a Ninja Foodi or similar model, use the accessory tray to double capacity without sacrificing crisp. 🔥
Burnt Edges
Blackened or burnt edges happen when the chicken sits too long at high heat. Monitor closely after 18 minutes, and pull it out at 165°F—it’ll carry over 5°F while resting.
If using a Cosori or Philips air fryer, reduce the temp to 365°F for the first 15 minutes, then crank to 400°F for the last 3 minutes. Avoid dark-colored baskets—they absorb more heat and can scorch delicate skin.
Dry or Tough Meat
Dry chicken usually means the brine time was too short or the chicken wasn’t rested. Minimum 4-hour brine is non-negotiable—overnight is ideal. After cooking, rest for 5-10 minutes before slicing. For extra tenderness, add 1 tbsp brown sugar to the brine.
If using boneless, skinless breasts, reduce air fry time to 12-14 minutes at 375°F—they cook faster and dry out easily. 💡
Stuck to the Basket
Chicken sticking happens when residual moisture isn’t fully evaporated. Pat dry thoroughly after brining, and lightly oil the basket with ½ tsp avocado oil before adding chicken. For stubborn pieces, use a spatula to gently lift them—don’t pry, or you’ll tear the skin.
If using wings or drumettes, cook them skin-side down for the first 5 minutes to prevent sticking. A silicon mat (like those for air fryers) can also help, but avoid non-stick sprays—they can burn at high temps.
Nutrition facts
Frequently asked questions
Can I use chicken breasts instead of thighs?
Yes, but with adjustments! Boneless, skinless breasts cook faster and dry out more easily. Use 12-14 minutes at 375°F instead, and avoid overcrowding. For extra tenderness, brine for overnight and pat very dry before air frying. The skin-on version crisps beautifully too—just add 5 minutes to the cooking time.
What if I don’t have cornstarch?
No problem! Substitute with 1 tbsp arrowroot powder or 2 tbsp panko breadcrumbs for texture. For a flour-free alternative, try 1 tbsp tapioca starch mixed with 1 tbsp honey. If you’re avoiding all starches, skip it entirely—the buttermilk brine still creates crispy skin, though it may be slightly less pronounced.
Can I make this ahead of time?
Cook the chicken and let it cool completely, then store in an airtight container for 4 days in the fridge. To restore crispiness, reheat in the air fryer at 375°F for 3-4 minutes. For freezing, cook first, then freeze for up to 3 months. Thaw overnight in the fridge before reheating.
Why does the recipe use buttermilk?
The buttermilk is the secret weapon! It tenderizes the chicken by breaking down proteins, while the acidity helps loosen the skin for maximum crispiness. The fat content also promotes browning. If you’re lactose intolerant, use lactose-free buttermilk or a mix of plain yogurt + 2 tbsp milk. The longer it brines (up to 24 hours), the juicier the result.
Can I use this method for chicken wings?
Yes, but adjust the time! Wings cook faster—air fry at 375°F for 12-15 minutes, flipping halfway. For extra crisp, toss in 1 tbsp cornstarch + 1 tbsp honey after brining. Serve with hot sauce or blue cheese dressing for a game-day favorite. Pro tip: Cook wings skin-side down first to prevent sticking.