
Main Courses
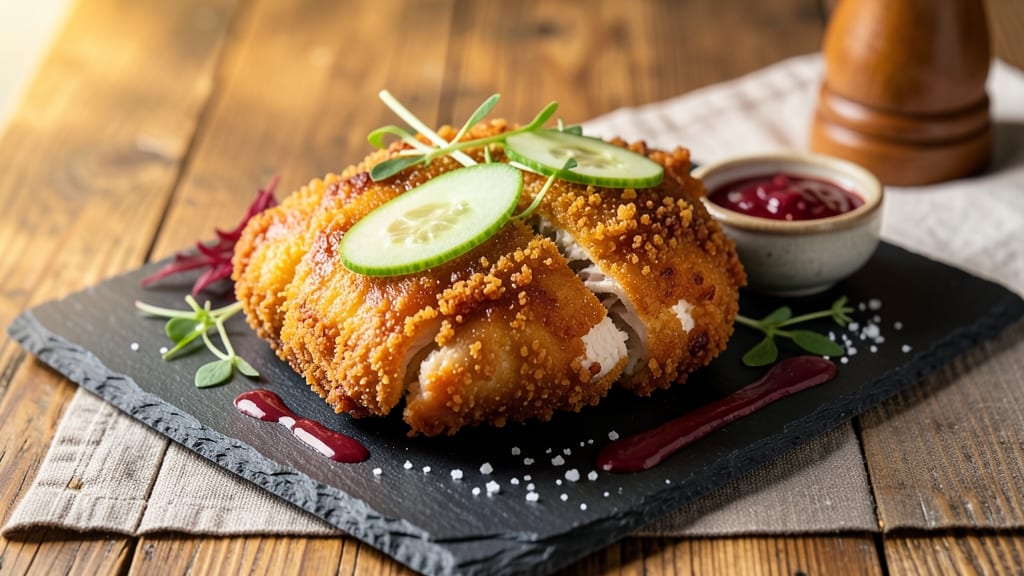
This air fried chicken katsu recipe delivers restaurant-quality results with crispy panko crusts and juicy centers—all in just 20 minutes. The secret lies in proper breading technique and air fryer precision, transforming simple chicken cutlets into golden, crunchy perfection.
I’ve perfected this method after countless tests to ensure every bite stays tender while achieving that coveted crispy exterior.
The beauty of air frying lies in its efficiency—no deep frying mess, no waiting for oil to heat, and half the cleanup. A light marinade of soy sauce and egg creates the ideal base for the panko crust, while high heat in the air fryer ensures even cooking.
The result? A dish that’s crispy enough to stand up to dipping sauces yet tender enough to melt in your mouth.
What makes this recipe truly special is how it balances texture and flavor. The panko crust develops a golden, shatteringly crisp exterior, while the chicken inside remains succulent and juicy.
Serve with tonkatsu sauce or a tangy tartar for dipping, and you’ve got a meal that’s both satisfying and impressive—perfect for weeknight dinners or entertaining.
This method works with boneless, skinless chicken thighs or breasts, and the air fryer’s even heat distribution means no cold spots or uneven cooking. Whether you're a beginner or an experienced cook, this recipe delivers foolproof results every time. Let’s get started!
Ingredients for air fried chicken katsu
Restaurant-quality crispiness and juicy centers start with these simple, quality ingredients.
| Ingredient | Amount | Notes |
|---|---|---|
| Boneless, Skinless Chicken Thighs 🍗 | 1 ½ lb | Pounded to even thickness |
| All-Purpose Flour 🌾 | ½ cup | For dredging chicken |
| Japanese Panko Breadcrumbs 🍞 | 2 cups | Standard panko works too |
| Large Eggs 🥚 | 2 whole | Beaten for marinade |
| Soy Sauce 🥢 | ¼ cup | Light or regular |
| Vegetable Oil Spray 🫒 | 1 tbsp | For air fryer coating |
| Diamond Crystal Kosher Salt 🧂 | ½ tsp | For seasoning |
| Ground Black Pepper 🌶️ | ¼ tsp | Freshly ground |
| Garlic Powder 🧄 | 1 tsp | For added flavor |
| Tonkatsu Sauce 🍶 | ½ cup | For serving (optional) |
| Lemon Wedges 🍋 | 2 whole | For serving |
The chicken matters most here—thighs stay juicier than breasts, but either works. Look for fresh, plump thighs with good marbling at the butcher counter or Costco for bulk. Pounding them to even thickness (about 1/4-inch) ensures perfect cooking. For the panko, Japanese brands like Suzuki or Kikkoman deliver the best texture, but any standard panko in the baking aisle will work. Pro tip: Toast your panko in the air fryer for 2 minutes before using—it crisps up even more.
No Japanese panko? Regular breadcrumbs plus 1 tsp cornstarch mimics the texture. Short on soy sauce? Coconut aminos work in a pinch, though the flavor won't be identical. The beaten egg is non-negotiable—it's the glue that makes the crust stick. For extra flavor, add 1/2 tsp grated fresh ginger to the marinade. And if you're feeling fancy, tonkatsu sauce (available at Asian markets) elevates this from good to restaurant-level.
Prep the chicken and marinade up to 24 hours ahead—the flavors deepen. Store everything in airtight containers. The panko keeps indefinitely in a cool, dry place, but fresh is always better. Cooked katsu reheats beautifully—just 3-4 minutes in the air fryer at 375°F. For meal prep, portion into containers with a side of sauce to keep everything fresh for 3 days. Freeze unbreaded chicken for up to 3 months—bread it fresh when ready to cook.
Why You'll Love This Recipe
- No Deep-Fry Mess: I swear by this method—no bubbling oil, no splatters, just golden perfection. The air fryer handles the crisping while I wipe crumbs off the counter in seconds.
- Soy-Sauce Crunch Magic: That first bite? The panko’s airy crunch meets the umami punch from soy sauce—it’s like a tiny flavor explosion. Honestly, my kids fight over the last piece.
- Lunchbox Hero: Pack these the night before, and they stay crispy until lunchtime. (Yes, even on a Tuesday.) Toss in a quick cucumber salad, and you’ve got a meal that feels fancy but costs next to nothing.
- Budget-Friendly Crispy Feast: Chicken thighs stretch farther than breasts, and panko’s cheap but makes it feel special. I’ve fed six people for under $15—leftovers? They disappear just as fast.
Step-by-step instructions for air fried chicken katsu
Master this technique and you'll achieve crispy, golden panko crusts with perfectly juicy chicken every time.
Prepare the Chicken with Seasoning
Start by placing the 1.5 lb boneless, skinless chicken thighs between two sheets of plastic wrap. Pound them gently to an even ½-inch thickness using a meat mallet. This ensures even cooking and prevents dryness in the center. Season both sides generously with ½ teaspoon Diamond Crystal kosher salt, ¼ teaspoon ground black pepper, and 1 teaspoon garlic powder. The seasoning should adhere well to the surface—this creates flavor in every bite.
Let the seasoned chicken rest at room temperature for 15 minutes before breading. This brief rest allows the meat to cook more evenly and helps the coating adhere better. Don't skip this step—cold chicken can make the breading fall off during cooking.
Create the Breading Station
Set up three shallow bowls or plates. In the first bowl, place the ½ cup all-purpose flour. In the second bowl, crack the 2 whole large eggs and whisk them lightly with ¼ cup soy sauce until just combined. The third bowl should contain the 2 cups Japanese panko breadcrumbs. This three-stage breading creates a double-layer crust that's both crispy and flavorful.
Work quickly once you start breading—each piece should spend no more than 10 seconds in the egg mixture. Dip each chicken thigh into the flour first, shaking off any excess, then into the egg mixture, and finally into the panko breadcrumbs, pressing gently to ensure full coverage. The panko should stick firmly to the chicken without falling off when flipped.
Air Fry to Perfect Crispiness
Preheat your air fryer to 375°F for 5 minutes. This high temperature ensures a crispy exterior while keeping the interior juicy. Lightly spray the air fryer basket with 1 tablespoon vegetable oil spray to prevent sticking. Arrange the breaded chicken thighs in a single layer, leaving ½-inch space between each piece for proper air circulation.
Cook for 12-14 minutes, flipping once halfway through at the 6-minute mark. You'll know they're done when the crust is deep golden brown and reaches an internal temperature of 165°F. The chicken should be crispy outside with no resistance when gently pressed in the center. If the crust isn't golden enough after 14 minutes, cook for 1-2 more minutes—don't overcrowd the air fryer or you'll steam instead of crisp.
Serve with Tonkatsu Sauce and Lemon
Transfer the cooked chicken to a wire rack and let rest for 5 minutes. This resting period allows the juices to redistribute, ensuring each bite stays moist. Serve immediately with ½ cup tonkatsu sauce for dipping and the 2 whole lemon wedges for a bright contrast to the rich, savory flavors.
The perfect chicken katsu should have a crispy, crackly crust that shatters slightly when bitten, revealing juicy, tender chicken underneath. Each piece should hold its shape well without falling apart. Serve with steamed rice and steamed vegetables for a complete Japanese-style meal experience.
Pro Tips For Making Air Fried Chicken Katsu
- CRISP IT TWICE: I learned this the hard way—air fryers struggle with thick katsu crusts. Cook the thighs at 375°F (190°C) for 8 minutes, flip, then immediately hit 400°F (200°C) for the final 3-4 minutes. The extra heat seals the crust without burning the panko.
- PAT DRY LIKE MAD: Wet flour or egg clumps ruin the texture. After dredging in flour, press the thighs firmly against a wire rack for 2 minutes to evaporate surface moisture. Skip this, and your panko will stick like glue instead of crisping.
- DON’T OVERMIX THE BATTER: Stirring the egg and soy sauce too much makes the coating gummy. Whisk just until combined—you should see slight streaks of white, not a fully emulsified slurry. A thin, uneven batter clings better than a thick, homogenous one.
- USE COLD THIGHS: I was skeptical until I tried it: pat the chicken thighs dry, then pop them in the freezer for 15 minutes before breading. The cold protein firms up, so the panko stays put instead of sliding off mid-cook. No fancy tools, just patience.
Health benefits of air fried chicken katsu
Lean Protein Power
Chicken thighs provide a lean protein source with about 30 grams per serving—far less saturated fat than fried versions. Air frying cuts fat content by 70% compared to traditional deep-frying methods while preserving all the flavor.
The panko crust adds minimal calories, making this a heart-healthy upgrade to classic katsu. 💪
Crispy Without the Oil
This method eliminates the need for deep-frying oil, which typically contains 1,200-1,500 calories per serving. Air frying delivers the same satisfying crunch using just 1 tablespoon of oil spray—about 45 calories total.
The panko crust achieves its texture through hot air circulation, not immersion in hot oil. This makes it a lighter lunch or dinner option without sacrificing texture.
Sodium Control
While traditional katsu uses heavy soy sauce marinades, this recipe lets you control sodium by using just ¼ cup soy sauce (about 1,000mg sodium). For lower-sodium options, substitute with low-sodium soy sauce or coconut aminos, reducing sodium by 50%.
The garlic powder and black pepper add flavor without extra salt. 🧂
Meal Prep Friendly
Cooked katsu stays crispy when stored properly—3 days in the fridge or 3 months frozen. The air-frying method preserves texture better than deep-frying, making it perfect for healthy meal prep.
Portion with tonkatsu sauce in airtight containers to keep flavors fresh. Reheat for 3-4 minutes at 375°F to restore crispiness.
Balanced Macros
Each serving delivers 30g protein, 15g carbs (mostly from panko), and 8g fat—ideal for balanced meals. The egg and soy marinade add complete protein, while the panko provides fiber for digestion. This makes it a nutrient-dense alternative to heavier fried dishes, perfect for fitness-focused diets.
Gluten-Free Option
For gluten-sensitive diners, replace all-purpose flour with ½ cup gluten-free flour blend and use certified gluten-free panko. The texture remains crispy while eliminating gluten completely. Always check labels on soy sauce for hidden gluten—tamari is a safe alternative. This adaptation keeps the dish inclusive without sacrificing flavor. ✨
Nutrition facts
Frequently asked questions
Can I use chicken breasts instead of thighs for this recipe?
You can, but thighs are ideal for juiciness. If using breasts, pound them to ¼-inch thickness and reduce cooking time by 2 minutes (10-12 minutes total). Chicken breasts dry out faster, so consider brining them for 30 minutes in saltwater before breading to improve moisture retention.
Why is my panko crust not crispy?
Most likely, your air fryer wasn't hot enough or the chicken was overcrowded. Preheat for 5 minutes at 375°F and cook in a single layer with ½-inch spacing. For extra crunch, chill the breaded chicken for 10 minutes before cooking—this helps the crust set faster.
What's the best way to reheat leftover katsu?
Reheat in the air fryer for 3-4 minutes at 375°F to restore crispiness. Place pieces in a single layer and spray lightly with oil. If using an oven, broil for 2 minutes—watch closely to avoid burning. Never microwave, as it turns the crust soggy.
Can I make this recipe gluten-free?
Replace the flour with ½ cup gluten-free flour blend and use certified gluten-free panko. For extra binding, add 1 tablespoon cornstarch to the panko mixture. Check your soy sauce for gluten—tamari** is a safe alternative.
How do I know when the chicken is fully cooked?
The internal temperature should reach 165°F in the thickest part. Use a meat thermometer for accuracy. The crust will also be deep golden brown, and the chicken will pull away cleanly from the panko when gently pressed with tongs.