
Sauces & Condiments
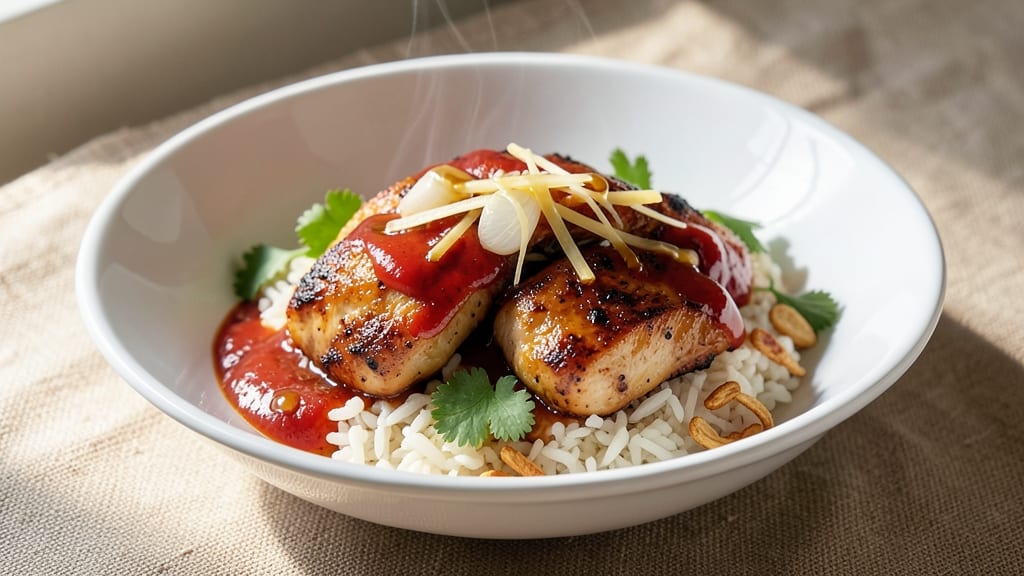
This basic chicken stir-fry sauce recipe transforms simple pantry staples into a bold, umami-rich sauce that elevates any stir-fry from ordinary to extraordinary. The secret lies in balancing salty soy, aromatic ginger, and pungent garlic—creating a foundation that’s both versatile and deeply flavorful.
I’ve perfected this sauce over years of testing, ensuring it delivers restaurant-quality depth without requiring specialty ingredients.
What makes this sauce stand out is its simple yet sophisticated flavor profile. A touch of honey or brown sugar adds subtle sweetness, while a splash of rice vinegar brightens the depth. The sauce thickens beautifully when simmered, clinging to chicken and vegetables for maximum flavor impact.
Unlike store-bought versions, this recipe avoids artificial additives, giving you control over the balance of salt, heat, and sweetness.
The result is a versatile sauce that works with everything from crispy chicken strips to tender vegetables and even noodles. It keeps well in the fridge for up to a week, making it perfect for meal prep or batch cooking.
Whether you’re cooking for one or feeding a crowd, this sauce delivers consistent, professional results every time.
Ready to elevate your stir-fries? This sauce is your secret weapon—simple to make, impossible to resist. Let’s get started with the ingredients and steps that will change the way you cook chicken forever.
Ingredients for basic chicken stir fry sauce
Nine pantry staples transform into a restaurant-quality stir-fry sauce that clings to chicken like magic.
| Ingredient | Amount | Notes |
|---|---|---|
| Low-Sodium Soy Sauce 🍶 | ½ cup | For authentic umami depth |
| Rice Vinegar 🍶 | ¼ cup | White or seasoned variety |
| Fresh Ginger 🌿 | 2 tbsp | Finely grated, aromatic |
| Garlic Cloves 🧄 | 4 cloves | Minced for pungent punch |
| Honey 🍯 | 2 tbsp | Wildflower preferred |
| Sesame Oil 🫒 | 1 tbsp | Toasted for nutty aroma |
| Cornstarch 🌾 | 1 tbsp | For thickening consistency |
| Fresh Red Chili 🌶️ | 1 piece | Seeded for mild heat |
| Sea Salt 🧂 | ½ tsp | Diamond Crystal preferred |
| Ground Black Pepper 🌶️ | ¼ tsp | Freshly cracked for bite |
The soy sauce is your flavor anchor—low-sodium versions let you control the saltiness better. Kikkoman or Lee Kum Kee are my go-tos, but any good-quality brand works. Fresh ginger and garlic? Don’t skimp—those jars of pre-minced garlic lack the same punch. I grab ginger at Whole Foods when it’s on sale, but the regular grocery store stuff is fine. For the chili, fresh red jalapeños add better heat than dried flakes, and Trader Joe’s sells them pre-seeded for convenience. The rice vinegar should smell tangy, not sour—Mushroom or Kewpie brands are my favorites.
No sesame oil? Toasted peanut oil works in a pinch, though the flavor won’t be identical. Short on honey? Brown sugar dissolved in warm water mimics the sweetness. The cornstarch is non-negotiable for thickening—Bob’s Red Mill is my brand of choice, but any food-grade starch works. Diamond Crystal sea salt dissolves better than table salt, so if you’ve got it, use it. For extra heat, swap the red chili with 1/2 tsp of chili flakes (adjust to taste). The sauce thickens as it simmers, so if you prefer it thinner, reduce the cornstarch to 1 teaspoon—it’ll still coat beautifully.
This sauce keeps for up to 2 weeks in the fridge, sealed tightly in a jar. Double the batch—it disappears fast. For longer storage, freeze in ice cube trays and pop out single servings as needed. The flavor actually improves after a day or two as the ingredients meld. Label your containers—it’s easy to mistake this for something else once cooled. Reheat gently on the stove or microwave for 20 seconds. Trust me, you’ll make this at least once a week after the first try.
Why You'll Love This Recipe
- Five-Ingredient Magic: I swear by this combo—soy, vinegar, ginger, garlic, and honey—because it’s the only sauce I need for stir-fry. No confusing blends or hard-to-find ingredients here, just pantry staples that transform plain chicken into something that actually makes people ask, “What’s in this?”
- Garlic-Ginger Kick: That fresh ginger and minced garlic? Oh, they’re the stars. The ginger adds a zesty warmth that cuts through the richness of the soy, while the garlic? It’s like a little flavor bomb that lingers in every bite—no need for fancy marinades or expensive sauces.
- Lunchbox Hero: Between us, this sauce is my secret weapon for meal prep. Toss it with pre-cut veggies and chicken, and it stays fresh in the fridge for days—perfect for packed lunches or when you’re too tired to cook. Honestly, I’ve eaten this cold straight from the container. (Don’t judge.)
- Budget Boost: Low-sodium soy sauce and rice vinegar? Check. A single ginger root and a head of garlic? Double check. This sauce costs me pennies but tastes like a restaurant dish—no splurging required. Plus, it stretches easily, so I can make a big batch and use it all week without breaking the bank.
Step-by-step instructions for umami-packed stir fry sauce
This sauce comes together in minutes with bold flavors that transform simple stir-fries.
Prepare the Aromatics and Chili
Peel and finely grate the 2 tablespoons fresh ginger using a microplane or fine grater. I like to press it against the grater several times to extract maximum juice and aroma. Mince the 4 cloves garlic into a fine paste—this ensures even distribution and prevents any bitter almond taste from raw garlic chunks.
Seed and finely chop the 1 piece fresh red chili, removing the white pith and membranes first. This gives you a subtle heat without overwhelming bitterness. Set these aromatics aside—they'll form the flavor foundation of your sauce. The reason we prep them first is that they release their oils and flavors immediately when combined with heat, so we want them ready to go when we start cooking.
Bloom the Garlic and Ginger
Heat a small saucepan over medium-low heat and add the 1 tablespoon sesame oil. Once the oil is shimmering but not smoking, add the minced garlic and grated ginger. Cook for 1-2 minutes until the garlic turns golden and fragrant—this is called blooming, and it develops their natural sweetness while preventing any raw garlic taste.
Watch carefully here—ginger and garlic burn quickly. You'll know it's ready when the mixture smells intensely aromatic and the garlic edges begin to turn golden. At this point, remove the pan from heat immediately to preserve those delicate flavors. This step is where the magic starts—these aromatics will carry through the entire sauce.
Combine Wet Ingredients
Return the pan to medium heat and add the 0.5 cup low-sodium soy sauce, 0.25 cup rice vinegar, and 2 tablespoons honey. Stir constantly for 3-4 minutes until the mixture begins to simmer and slightly reduce. The soy sauce will darken slightly as it heats, and the vinegar will add a bright acidity that balances the richness.
Here's where it gets interesting—the honey should begin to caramelize just slightly at the edges. You'll see tiny bubbles forming and the mixture will thicken just a bit. This is normal and actually enhances the sauce's depth of flavor. If you notice the sauce is reducing too quickly (it will become syrupy), reduce the heat slightly to medium-low to prevent scorching.
Thicken the Sauce
In a small bowl, whisk together the 1 tablespoon cornstarch with 2 tablespoons water to create a smooth slurry. Once your sauce has simmered for 3-4 minutes, remove it from heat and slowly pour in the cornstarch mixture while whisking vigorously. Return the pan to medium heat and stir continuously for 1-2 minutes until the sauce thickens to a glossy, coatable consistency.
You'll know it's ready when the sauce pulls away from the sides of the pan slightly and leaves a clean streak when you run your finger through it. This thickening step is critical—it ensures your sauce clings beautifully to stir-fried chicken and vegetables. If it thickens too quickly, add 1 tablespoon water at a time until you reach your desired consistency.
Finish with Seasonings and Chili
Remove the pan from heat and stir in the chopped fresh red chili, 0.5 teaspoon sea salt, and 0.25 teaspoon ground black pepper. Taste immediately—this is your quality control moment. The sauce should be perfectly balanced: salty from the soy and salt, sweet from the honey, tangy from the vinegar, with a subtle heat from the chili and aromatic depth from the ginger and garlic.
If you find it needs more balance, adjust here: more salt for depth, more vinegar for brightness, or a touch more honey for sweetness. The sauce should be vibrant and glossy, ready to elevate any stir-fry. Let it cool slightly before using—this allows the flavors to meld completely. This sauce keeps well in the refrigerator for up to 1 week, making it perfect for meal prep.
Pro Tips For Making Basic Chicken Stir Fry Sauce
- MINCE THE GINGER FINE: I learned this the hard way—chunky ginger in stir-fry sauce just sits there like a textured afterthought. Use the flat side of your knife to smash the knob first, then mince into tiny, even pieces (think rice grains, not pebbles). That way, it dissolves smoothly into the sauce instead of clumping or leaving chewy bits.
- COOK GARLIC LOW AND SLOW: Garlic burns faster than you’d think, and once it’s bitter, there’s no fixing it. After adding the minced garlic to the pan, immediately turn the heat down to medium-low and stir constantly—like you’re babysitting a toddler. It should just barely sizzle, not brown. Trust me, no one wants to taste regret in their sauce.
- MEASURE VINEGAR FIRST: Rice vinegar’s acidity cuts through the sweetness, but too much turns your sauce into a tangy punch. Start with half the amount listed in the recipe, taste, then add more gradually. I used to dump it all in and end up with a sauce that could strip paint. Better to adjust than regret.
- SWAP HONEY FOR MAPLE (IF YOU DARE): Honey crystallizes faster than you’d expect, especially if you’re not using it right away. Keep it warm in a small bowl over simmering water (or just microwave it for 10 seconds) until it’s liquid again—no one wants to dig through clumps. For a smoother sauce, swap honey for the same amount of maple syrup; it blends better and won’t play hide-and-seek in your fridge.
Make-ahead tips for this recipe
Prep Ahead Components
Break down the sauce into its core components to extend its shelf life. Store the soy sauce, rice vinegar, honey, and cornstarch slurry in separate airtight containers in the fridge for up to 5 days.
Keep the ginger, garlic, and chili fresh in a sealed container in the refrigerator for 3-4 days—grate or mince them just before combining with the wet ingredients. This separation prevents the sauce from thickening prematurely and keeps the aromatics vibrant. 🌿
Batch and Freeze
Double or triple the recipe and freeze it in ice cube trays for single-serving portions. Once frozen, transfer the cubes to a freezer-safe bag, squeezing out excess air to prevent freezer burn.
These cubes thaw in 10 minutes in a bowl of warm water or microwave for 30 seconds—perfect for quick stir-fries. The sauce maintains its quality for up to 3 months in the freezer, though I recommend using it within 2 months for peak flavor. 🧊
Thickening Adjustments
If you’re prepping the sauce ahead, reduce the cornstarch to ½ tablespoon initially. Reheat the sauce on the stovetop and add the remaining ½ tablespoon cornstarch (mixed with 1 tablespoon water) to thicken it to your preferred consistency.
This two-step approach prevents over-thickening during storage. For a smoother texture, strain the reheated sauce through a fine-mesh sieve to remove any lumps. 💡
Flavor Boosting
Add a 1-teaspoon splash of fish sauce or 1 teaspoon of oyster sauce to the frozen cubes for extra umami depth. These additions enhance the sauce’s complexity without altering its base balance.
For a spicier version, freeze extra chopped chili in separate cubes and add it fresh when reheating. The frozen chili retains its heat and aroma better than dried flakes. 🌶️
Reheating Techniques
Reheat the sauce on the stovetop over medium-low heat for 3-4 minutes, stirring constantly to prevent scorching. For microwave reheating, use 50% power for 1-2 minutes, stirring in between, until it reaches 165°F.
Add 1 tablespoon water if the sauce seems too thick after reheating. Always taste and adjust seasonings—reheated sauce often needs a pinch more salt or a dash of vinegar to brighten it. ✨
Storage Containers
Use glass jars with tight-sealing lids for fridge storage—they’re non-reactive and preserve flavors better than plastic. For the freezer, opt for silicone molds or BPA-free plastic containers with 1-inch headspace to account for expansion.
Label containers with the date and "Stir Fry Sauce" to avoid confusion. I keep a dedicated jar in my fridge for quick access during weeknight cooking. 📅
Nutrition facts
Frequently asked questions
Can I make this sauce without cornstarch?
Yes! If you don't have cornstarch, substitute with 1 teaspoon arrowroot powder or 1 tablespoon tomato paste for thickening. For a thinner, more liquid sauce, skip the thickener entirely—just simmer the wet ingredients longer (5-6 minutes) to reduce naturally. The sauce will still coat well when tossed with stir-fried chicken.
How do I adjust the heat level? For milder heat, remove the chili entirely and add ¼ teaspoon sugar instead. For extra spice, increase to 2 pieces fresh chili or add ½ teaspoon red pepper flakes.
What's the best way to store leftover sauce?
Transfer to an airtight glass jar and refrigerate for up to 1 week. For longer storage, freeze in ice cube trays—each cube makes one serving. Thaw overnight in the fridge or microwave for 20 seconds before using. The sauce actually improves in flavor after 2-3 days as the ingredients meld.
Can I use this sauce for other proteins?
This sauce works perfectly with shrimp, tofu, or beef. For seafood, reduce the soy sauce to ¼ cup to prevent overpowering. With beef, add ½ teaspoon smoked paprika for depth. The same sauce also elevates vegetable stir-fries—just reduce the salt slightly since veggies don't contain as much natural sodium.
Why did my sauce turn out too salty?
Low-sodium soy sauce can still vary in saltiness. If your sauce tastes too salty, balance it by adding 1-2 teaspoons more honey or 1 tablespoon rice vinegar. For future batches, try ½ cup soy sauce instead of ½ cup to reduce saltiness while maintaining umami. Taste as you go—this sauce is meant to be adjusted to your preference!