
Main Courses
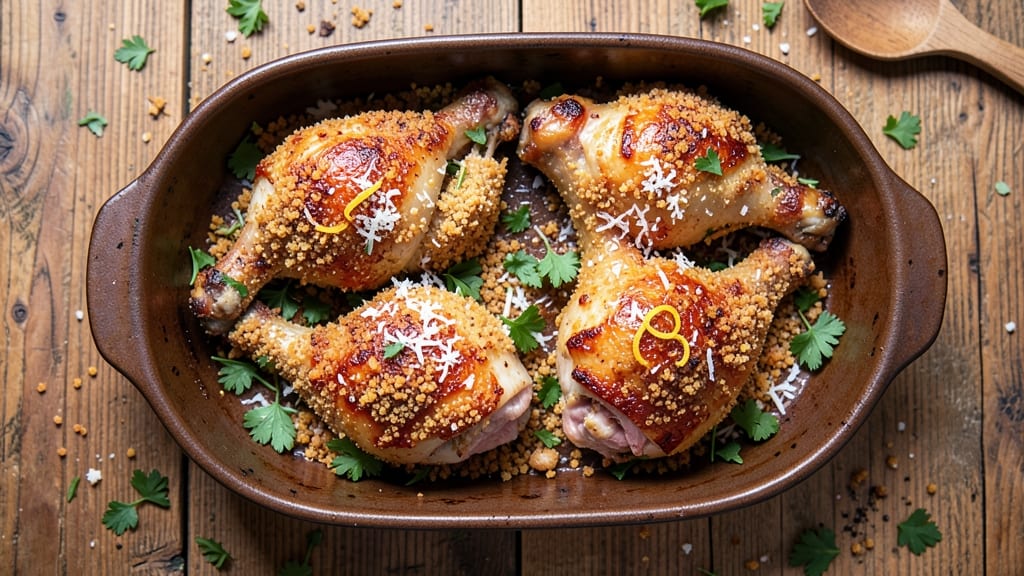
This baked chicken legs recipe with bread crumbs delivers restaurant-quality results with a golden, shatteringly crisp crust that stays crunchy even after resting. The secret lies in double-dredging the chicken and baking at the right temperature—no frying required.
I've perfected this technique over years of testing, and the difference between soggy and perfectly crispy is all in the method.
What sets this recipe apart is the foolproof breading technique that creates a crust so crisp it could pass for fried, while keeping the meat juicy inside. We use a mix of panko and regular breadcrumbs for extra crunch, plus a touch of parmesan for depth.
The chicken bakes until the internal temperature reaches 165°F, ensuring it's fully cooked without drying out.
By the time you pull these from the oven, you'll have chicken legs with a crispy, caramelized exterior that shatters at every bite, while the meat stays tender and flavorful underneath.
The aroma alone will have everyone gathering at the table—this is comfort food at its finest, elevated to restaurant-quality standards.
The best part? These chicken legs reheat beautifully, making them perfect for meal prep or leftovers. Serve with a side of roasted vegetables or a fresh salad to round out the meal. Let's get started on creating your crispiest baked chicken yet.
Ingredients for baked chicken legs recipe with bread crumbs
Four crispy chicken legs and a few pantry staples transform into restaurant-quality comfort food.
| Ingredient | Amount | Notes |
|---|---|---|
| Chicken Legs 🍗 | 4 whole | Bone-in, skin-on preferred |
| All-Purpose Flour 🌾 | ½ cup | For dredging first layer |
| Panko Breadcrumbs 🍞 | 1 cup | For crispy texture |
| Regular Breadcrumbs 🍞 | ½ cup | For extra crunch |
| Parmesan Cheese 🧀 | ¼ cup | Freshly grated from block |
| Large Eggs 🥚 | 1 whole | Beaten for egg wash |
| Olive Oil 🫒 | 2 tbsp | For brushing chicken |
| Garlic Powder 🧄 | 1 tsp | For flavor depth |
| Onion Powder 🧅 | 1 tsp | For savory notes |
| Paprika 🌶️ | 1 tsp | Smoked variety preferred |
| Salt 🧂 | 1 ½ tsp | Kosher or sea salt |
| Black Pepper 🌶️ | ½ tsp | Freshly ground preferred |
| Dried Thyme 🌿 | ½ tsp | Or 1 tbsp fresh thyme |
The chicken legs should be similar in size for even cooking. Look for bone-in, skin-on legs at the grocery store—they stay juicier. Trader Joe's and Costco often have good prices on these, but any supermarket works. For the breadcrumbs, Japanese panko is key for that shatteringly crisp texture, while regular breadcrumbs add body. The Parmesan adds depth of flavor—grate it yourself for the best results. If you can't find freshly grated, use pre-grated but pick up the kind in a can, not the powdery stuff.
No panko? Toast regular breadcrumbs in a dry pan for 3-4 minutes to mimic the crispiness. Short on Parmesan? Pecorino Romano or nutritional yeast work in a pinch. The egg wash is non-negotiable—it helps the breading stick. For extra flavor, add a pinch of garlic powder and onion powder to your egg mixture. If you're prepping ahead, keep the breaded chicken uncovered in the fridge for up to 24 hours—just bake straight from the fridge, adding 5-10 minutes to the cooking time.
These chicken legs reheat beautifully—4-5 minutes at 375°F in the oven works perfectly. Store leftovers in an airtight container for 3-4 days or freeze for up to 3 months. For meal prep, bake an extra batch and portion them into containers. The crust stays crispy even after reheating, making these ideal for lunches all week. Serve with a side of roasted vegetables or a fresh salad to balance the richness.
Why You'll Love This Recipe
- One-Pan Magic: I swear by this recipe when I’m too tired to scrub pots—just toss the chicken legs in flour, coat them in that panko-parmesan mix, and bake. The crispy crumbs stick to the pan like glue, but it all slides right off when you’re done. (Yes, even on a Tuesday night.)
- Crispy-Creamy Obsession: That double breadcrumb layer—panko for crunch, regular crumbs for texture—paired with melted parmesan? It’s the kind of bite that makes my family pause mid-conversation. The outside shatters, but inside, the chicken stays juicy and tender. Honestly, I’ve tried fancier recipes, but this one’s my secret weapon.
- Game for Any Meal: Slap these on a charcuterie board for game day, pack them for lunch the next day, or serve them as-is for a lazy dinner. The crumbs stay crispy even reheated, and the flavor holds up—no sad, dry chicken here. (My daughter picks out the best pieces, but still asks for seconds.)
- Budget Crunch: Chicken legs are my wallet’s best friend, and this recipe stretches them further. A pound of thighs feeds four, and the crumb mix costs pennies. Plus, leftovers reheat like a dream—toss them in the oven for 10 minutes, and they’re crispy again. No takeout needed.
Step-by-step instructions for baked chicken legs with bread crumbs
Here's the method that delivers a golden, shatteringly crisp crust while keeping the meat juicy inside.
Prepare the Chicken and Seasoning Mixture
Preheat your oven to 425°F for maximum crispiness. Pat the 4 whole chicken legs completely dry with paper towels—this is non-negotiable for crispy skin. In a shallow bowl, whisk together the 0.5 cup all-purpose flour, 1 tsp garlic powder, 1 tsp onion powder, 1 tsp paprika, 1.5 tsp salt, 0.5 tsp black pepper, and 0.5 tsp dried thyme. This dry rub will form the flavor foundation under the breadcrumb crust.
In another bowl, beat the 1 whole large egg until just combined. The egg wash creates adhesion between the chicken and breadcrumbs. I like to add 2 tbsp olive oil to the egg mixture for extra richness and help with browning. This is where the magic starts—proper prep ensures that crispy crust stays intact.
Create the Crispy Breadcrumb Coating
In a third bowl, combine the 1 cup panko breadcrumbs and 0.5 cup regular breadcrumbs for that perfect balance of airiness and crunch. Stir in the 0.25 cup freshly grated Parmesan cheese—this adds depth of flavor and helps the coating stick better. The panko gives that signature light, crispy texture while the regular breadcrumbs add extra crunch that lasts through serving.
Here's the thing—don't skip the Parmesan. It might seem like an extra step, but it makes a noticeable difference in both flavor and texture. The cheese melts slightly during baking, creating a glue-like effect that keeps the breadcrumbs from falling off. Mix everything together until evenly distributed and ready for coating.
Coat the Chicken Legs Thoroughly
Working with one leg at a time, dip each piece into the egg wash, letting any excess drip off. Then press it firmly into the breadcrumb mixture, coating all sides completely. I use my fingers to pack the crumbs onto the chicken—this ensures maximum coverage and that satisfying crunch. Pay special attention to the skin side, as this will be the most visible part when served.
Place the coated chicken legs on a parchment-lined baking sheet, leaving about 1 inch between each piece. This spacing allows hot air to circulate, creating even browning. If any breadcrumbs fall off during this process, simply press them back into place. The goal is to create an even, thick coating that will transform into a golden crust.
Bake Until Golden and Crisp
Transfer the prepared baking sheet to the preheated 425°F oven. Bake the chicken legs for 45-50 minutes, flipping each piece halfway through cooking at the 25-minute mark. This flip ensures both sides develop that perfect golden-brown crust. You'll know they're ready when the skin is deep golden and the internal temperature reaches 175°F in the thickest part of the meat.
Don't be tempted to open the oven door before the 25-minute mark—every time you peek, you risk losing heat and steam, which can make the crust soggy instead of crispy. The skin should be so crisp that it almost shatters when you press it gently with tongs. If it's browning too quickly, tent with foil for the last 10 minutes to prevent burning.
Rest and Serve for Maximum Crispiness
Remove the chicken legs from the oven and transfer them to a wire rack. Let them rest for 5-10 minutes before serving. This resting period is crucial—it allows the juices to redistribute throughout the meat while keeping that crispy crust intact. If you serve them immediately, you risk the crust becoming soft as the juices escape.
The result should be chicken legs with a shatteringly crisp crust that stays crunchy even when served at room temperature. The meat inside should be tender and juicy, perfectly complementing the savory, herby breadcrumb coating. Serve with your favorite dipping sauce or alongside roasted vegetables for a complete meal.
Pro Tips For Making Baked Chicken Legs Recipe With Bread Crumbs
- Pat dry the chicken: I learned this the hard way—wet skin means soggy breading. Use paper towels to wipe the legs thoroughly before dredging, even if they look dry. The extra 30 seconds saves you from a gummy crust later.
- Mix panko with Parmesan: Skip the plain panko—toss it with grated Parmesan (about 1/4 cup) for a richer, stickier coating that clings better. The cheese melts slightly during baking, locking the crumbs in place like glue.
- Bake in batches: Crowding the tray leads to uneven cooking and steam that softens the crust. Leave at least 1 inch between legs, and if your oven’s too small, bake in two rounds. Patience here guarantees crispy, not greasy, results.
- Rest before serving: Resist the urge to cut into them right out of the oven. Let the chicken sit 5 minutes under foil—this lets the juices redistribute so every bite stays moist. I know, I know, but trust the process.
Best sauces and condiments for this baked chicken legs recipe with bread crumbs
Classic Honey Mustard
This sweet-and-tangy sauce is a perfect match for the crispy breadcrumb crust. I blend ¼ cup Dijon mustard, 2 tbsp honey, 1 tbsp apple cider vinegar, and 2 tbsp olive oil until smooth.
The mustard cuts through the richness of the chicken while the honey adds a subtle sweetness. Serve warm or at room temperature for best flavor balance. 🍯
Garlic Aioli
For a creamy, rich dip, whip together ½ cup mayonnaise, 1 tbsp lemon juice, 1 minced garlic clove, and ½ tsp smoked paprika. The garlic enhances the savory notes in the breading, while the aioli's creaminess provides a luxurious contrast.
I like to add a pinch of salt to elevate the flavors further. This sauce pairs beautifully with the crispy exterior while keeping the chicken's juices intact. 🧄
Spicy Sriracha Mayo
Add some heat with a mix of ½ cup mayonnaise, 1 tbsp sriracha, and 1 tsp lime juice. The spicy kick complements the crispy texture perfectly, especially if you prefer your chicken with a little bite. For extra depth, stir in ½ tsp grated ginger.
This sauce works well both as a dipping sauce and as a post-baking glaze—brush it on the chicken during the last 5 minutes of baking for a glossy finish. 🌶️
Herbed Yogurt Dip
A lighter option that still packs flavor, this dip combines ½ cup Greek yogurt, 1 tbsp chopped fresh dill, 1 tbsp chopped fresh parsley, 1 clove minced garlic, and a squeeze of lemon.
The tangy yogurt balances the richness of the chicken, while the herbs add freshness. I like to serve this chilled with a sprinkle of everything bagel seasoning on top for an extra crunchy element. 🌿
BBQ Glaze
For a smoky, sweet finish, mix ¼ cup BBQ sauce (I recommend Sweet Baby Ray's), 1 tbsp apple cider vinegar, and 1 tsp brown sugar. Brush this glaze onto the chicken during the last 10 minutes of baking for a caramelized, sticky exterior.
The smoky notes pair wonderfully with the herby breadcrumb crust, creating a flavor profile that's both bold and balanced. 🍖
Lemon Butter Sauce
Finish with elegance using 2 tbsp melted butter, 1 tbsp lemon juice, and ½ tsp lemon zest. Drizzle this over the baked chicken legs just before serving to add a luxurious, buttery shine.
The bright citrus cuts through the richness of the breadcrumbs, making each bite feel fresh and vibrant. This sauce is especially effective when served alongside roasted vegetables or a crisp salad. 🍋
Nutrition facts
Frequently asked questions
Why do I need to pat the chicken legs completely dry before coating?
Moisture is the enemy of crispy breadcrumbs! When you skip drying, the steam from the chicken softens the coating instead of crisping it. Pat each leg with paper towels until completely dry—this ensures that golden, shatteringly crisp crust we're all after.
Can I use boneless chicken legs for this recipe?
Yes, but expect slightly different results. Bone-in, skin-on legs stay juicier and have more surface area for crispy coating. Boneless legs will cook faster (35-40 minutes instead of 45-50 minutes) and may dry out more quickly. If using boneless, reduce oven temperature to 400°F and check for doneness at 165°F internal temp.
What's the best way to keep the breading from falling off during baking?
Press the breadcrumbs firmly onto the chicken using your fingers—this creates a strong bond. The Parmesan cheese in the coating acts like glue, and the egg wash provides adhesion. For extra security, chill the breaded chicken for 30 minutes before baking. This helps the coating set before it hits the oven heat.
Can I make this recipe ahead of time?
Bread the chicken up to 24 hours ahead and store uncovered in the fridge. Bake straight from the fridge, adding 5-10 extra minutes to the cooking time. For best results, bake from room temperature if possible—just let the chicken sit out for 30 minutes before baking. The crust will still be crispy!
How do I fix chicken that's too dry after baking?
Overcooking is the usual culprit. Always use a meat thermometer—165°F internal temp is perfect. If your chicken is dry, try these fixes:
- Baste with butter during the last 10 minutes of baking,
- Serve with a sauce (like the honey mustard or garlic aioli), or
- Reheat with moisture—place dry chicken on a baking sheet with 2 tbsp water and cover with foil for 5 minutes at 350°F.