
Main Courses
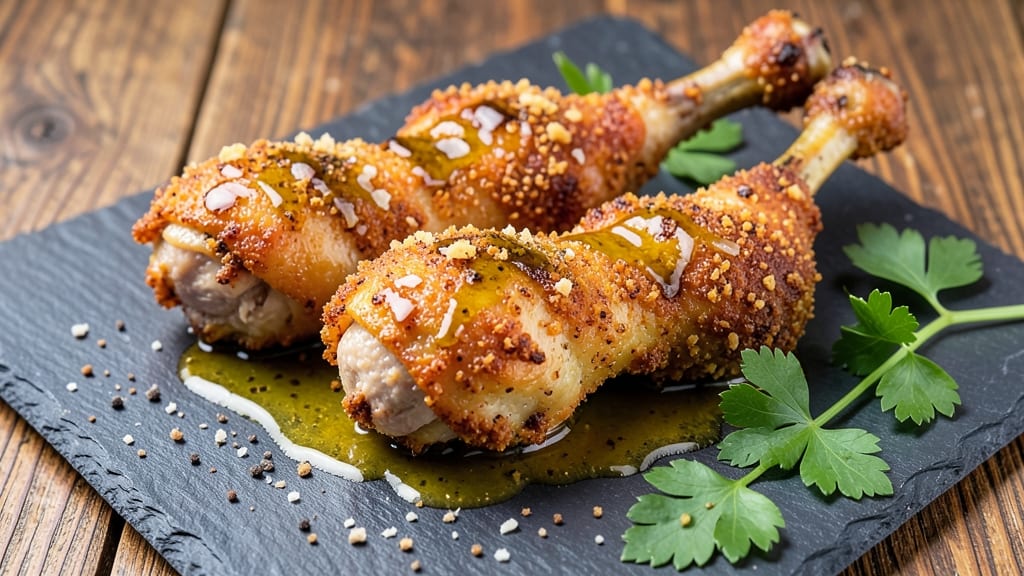
This baked breaded chicken legs recipe delivers the perfect balance of crispy parmesan crust and juicy, golden meat without deep-frying. The secret lies in a double-dredging technique that creates an irresistible crunch while keeping the interior tender. I've perfected this method over countless batches, ensuring every bite is restaurant-quality.
The process starts with a simple yet flavorful breading mix of flour, seasoned breadcrumbs, and grated parmesan, followed by an egg wash that locks in moisture. Baking at the right temperature—425°F—is crucial for achieving that golden-brown crust while maintaining juicy meat inside.
This recipe transforms ordinary chicken legs into a showstopping main course that's surprisingly easy to master.
What you'll end up with is chicken legs that are crispy on the outside with a perfectly golden parmesan crust, while the meat stays tender and succulent.
The aroma alone will have everyone gathering around the table, and the first bite delivers that satisfying crunch followed by juicy, flavorful chicken. This dish is ideal for family dinners, game days, or whenever you crave comfort food with a gourmet twist.
Pair these with roasted potatoes or a fresh salad for a complete meal. The best part? No deep-frying required—just a simple baking sheet and 30 minutes of hands-off cooking time. Let's get started on creating these irresistible chicken legs that everyone will love.
Ingredients for baked breaded chicken legs
The essential ingredients for restaurant-quality baked breaded chicken legs with perfect golden crust and juicy meat inside.
| Ingredient | Amount | Notes |
|---|---|---|
| Chicken Legs 🍗 | 4 whole | Bone-in, skin-on for best flavor |
| All-Purpose Flour 🌾 | 1 cup | For dredging, sifted preferred |
| Italian Seasoned Breadcrumbs 🍞 | 1 ½ cups | Panko for extra crunch option |
| Freshly Grated Parmesan Cheese 🧀 | ¾ cup | Block form for best texture |
| Large Eggs 🥚 | 2 whole | Room temperature for even coating |
| Extra-Virgin Olive Oil 🫒 | 2 tbsp | For brushing between layers |
| Garlic Powder 🧄 | 1 tsp | Freshly ground preferred |
| Onion Powder 🧅 | 1 tsp | Enhances breading flavor |
| Ground Black Pepper 🌶️ | ½ tsp | Freshly cracked for intensity |
| Diamond Crystal Kosher Salt 🧂 | 1 tsp | For seasoning and crust |
| Cornstarch 🌾 | 1 tbsp | For extra crispiness |
The chicken legs are the star—bone-in, skin-on cuts deliver the most flavor and stay juicy during baking. Whole Foods or Trader Joe's carry excellent quality, but any reputable grocery store will have them. Look for legs with good marbling and minimal bruising. For the breading, freshly grated Parmesan makes all the difference—pre-grated cheese gets clumpy and lacks that sharp, salty punch. The Italian seasoned breadcrumbs from Bread Ahead brand are my go-to for that perfect balance of seasoning, but any quality brand works. Panko can be substituted for an extra-crispy texture, though it may require a slightly longer baking time to achieve the same level of browning.
No Italian seasoned breadcrumbs? Panko mixed with 1 tsp dried parsley and ½ tsp dried oregano replicates the flavor profile well. Running short on Parmesan? Pecorino Romano works in a pinch, but reduce to ⅔ cup for similar sharpness. The cornstarch is crucial for that signature crispiness—don't skip it. For the egg wash, room temperature eggs coat more evenly. If you're short on time, microwave the eggs for 20 seconds to just warm them up. The garlic and onion powders can be swapped for fresh minced garlic and onion if you prefer, though the powdered versions blend more uniformly into the breading mixture. Always season your chicken legs generously with salt before the first dredge—this builds flavor layer by layer.
Store any unused breadcrumbs or Parmesan in airtight containers in your pantry for up to 2 weeks. The seasoned breadcrumb mixture keeps for 5 days in the fridge if you want to prep ahead. These chicken legs reheat beautifully—350°F for 10-12 minutes restores that crispy texture. For meal prep, portion into individual containers with a sprinkle of fresh parsley on top. The flavor actually improves the next day as the crust sets further. Freeze unbaked legs for up to 3 months—bake straight from frozen, adding 5-7 minutes to the cooking time. The double-dredging technique means they'll stay crispy even after reheating.
Why You'll Love This Recipe
- One-Pan Magic: I swear by this recipe when I’m too tired to scrub pots—just toss the chicken, flour, egg, and breadcrumbs on a sheet pan, bake, and boom. The Parmesan crust sticks to the pan like it’s meant to, so cleanup is basically rinsing a single tray.
- Crispy-Creamy Obsession: That Italian seasoning and Parmesan combo? It’s the kind of flavor that makes you forget you’re eating chicken. The outside gets shatteringly crisp while the inside stays juicy—like a hug from your nonna’s kitchen.
- Game for Any Night: Between us, this is my go-to for date nights, lazy Sundays, or when my kid’s soccer team shows up hungry. Serve it with marinara for a no-fuss dinner or slice it cold for sandwiches the next day—it’s that adaptable.
- Budget-Friendly Feast: Chicken legs stretch further than breasts, and with just five ingredients, this feeds four for under $12. The leftovers? Even better reheated—crispy edges intact, no soggy breading in sight. My wallet and my taste buds thank me.
Step-by-step instructions for baked breaded chicken legs
Here's the method for achieving that perfect balance of crispy exterior and juicy interior.
Prepare the Chicken Legs for Breading
Pat the 4 whole Chicken Legs completely dry with paper towels, removing any excess moisture from the skin and cavity. This step is crucial—wet skin prevents proper browning and crisping. Place the legs on a wire rack set over a baking sheet to allow air circulation on all sides.
In a small bowl, combine 1 cup All-Purpose Flour, 1 tbsp Cornstarch, 1 tsp Diamond Crystal Kosher Salt, 1 tsp Garlic Powder, 1 tsp Onion Powder, and 0.5 tsp Ground Black Pepper. Whisk until evenly distributed. This dry mixture creates the foundation for your crispy crust. The cornstarch adds extra crunch while preventing the breading from becoming soggy.
Create the Breading Station
In a shallow dish, beat the 2 whole Large Eggs until just combined. The eggs should be at room temperature for even coating—if they're cold, they won't adhere properly. In another shallow dish, mix the 1.5 cups Italian Seasoned Breadcrumbs with the 0.75 cup Freshly Grated Parmesan Cheese. This combination gives you that perfect balance of crunch and cheesy flavor.
Here's where technique matters: Dip each chicken leg first into the flour mixture, pressing gently to adhere the seasoning. Shake off any excess, then dip into the beaten egg, allowing any excess to drip off. Finally, press the leg into the breadcrumb mixture, coating it completely. The breading should stick firmly—if it falls off easily, you're not pressing hard enough. Repeat with all legs and let them rest on a wire rack for 5 minutes before baking.
Bake to Crispy Perfection
Preheat your oven to 400°F with the rack positioned in the middle. Line a baking sheet with parchment paper or lightly grease it with 1 tbsp Extra-Virgin Olive Oil—this prevents sticking and adds a subtle flavor. Arrange the breaded chicken legs on the prepared sheet, leaving about 1 inch between each piece for proper air circulation.
Bake for 35-40 minutes, flipping the legs once halfway through at the 20-minute mark. You'll know they're done when the breading is deep golden brown and the internal temperature reaches 165°F at the thickest part of the meat. The cornstarch in the flour mixture ensures that crispy texture we're after, while the parmesan adds a savory depth to every bite.
Rest and Serve
Transfer the baked chicken legs to a wire rack and let them rest for 5-10 minutes before serving. This resting period allows the juices to redistribute throughout the meat, preventing them from pooling and making the chicken dry at the surface. The breading will stay crispy during this time, maintaining that perfect texture contrast.
Serve immediately with your favorite dipping sauce or alongside roasted vegetables. The result should be a perfectly crispy parmesan crust that gives way to juicy, flavorful meat with every bite. The combination of garlic and onion powder in the seasoning adds a subtle savory note that complements the richness of the parmesan.
Pro Tips For Making Baked Breaded Chicken Legs
- Pat the chicken dry: I learned this the hard way—wet skin = soggy breading. Use paper towels to wipe down the legs thoroughly before dredging, especially around the joints where moisture hides.
- Mix cold egg whites: My grandmother swore by this, and she was right: whisk the eggs with a splash of cold water (about 2 tablespoons) for a lighter, stickier coating that clings better than straight-up beaten eggs.
- Bake in batches: Skip the crowding—pack too many on the tray and the breading turns greasy instead of crisp. Leave ½-inch gaps and rotate the pan halfway if your oven runs hot.
- Spritz with oil midway: Does it look weird? Yes. Does it work? Every single time. After 15 minutes, lightly spray the breaded legs with olive oil (about 1 teaspoon total) to revive the crust if it’s losing its golden edge.
Serving suggestions for this recipe
Classic Dipping Sauces
No crispy chicken legs are complete without a dipping sauce! My go-to is a creamy garlic aioli made with ½ cup mayonnaise, 1 minced garlic clove, 1 tbsp lemon juice, and a pinch of salt.
Mix everything together and chill for 30 minutes to let the flavors meld. For a tangy twist, try a honey mustard sauce with 2 tbsp Dijon mustard, 2 tbsp honey, and 1 tbsp apple cider vinegar. Both sauces cut through the richness beautifully. 🥄
Side Dish Pairings
For a complete meal, serve these chicken legs with garlic roasted potatoes—toss 1.5 lbs baby potatoes with 2 tbsp olive oil, 1 tsp garlic powder, and ½ tsp smoked paprika, then roast at 425°F for 30 minutes.
A crisp green salad with a balsamic vinaigrette balances the richness. I love adding cherry tomatoes, cucumber slices, and feta cheese crumbles for extra texture. 🥔
Garnish for Presentation
Elevate your dish with fresh garnishes! Sprinkle chopped parsley or cilantro over the chicken just before serving for a pop of color. A drizzle of hot honey adds a sweet-spicy contrast, while lemon wedges let guests squeeze fresh juice over their bites.
For a fancy touch, arrange the chicken legs on a wooden board with a scattering of toasted breadcrumbs around the base. 🌿
Game Day Spread
Turn this into a crowd-pleasing appetizer by serving with warm dinner rolls and pickled vegetables. I love adding quick-pickled red onions (slice ½ red onion, soak in ½ cup vinegar, 1 tbsp sugar, and ½ tsp salt for 30 minutes) for a tangy crunch.
For extra fun, set up a DIY sauce bar with small bowls of different dipping options. 🏈
Meal Prep Adaptations
Make ahead for easy lunches! Bake the chicken legs as directed, then store them in an airtight container for up to 3 days. Reheat in a 350°F oven for 10-12 minutes to restore crispiness. Pack with roasted veggies and a small container of sauce for a balanced meal.
For a freezer-friendly version**, bake the legs, let them cool completely, then freeze in a single layer before transferring to a bag. Thaw overnight in the fridge and reheat as above. ❄️
Nutrition facts
Frequently asked questions
Why do my breaded chicken legs get soggy instead of crispy?
Soggy breading usually happens when moisture gets trapped under the crust. Always pat the chicken completely dry before breading, and use a wire rack for baking to allow air circulation. The cornstarch in the flour mix is key—it helps absorb moisture and create that signature crunch. Also, avoid overcrowding the baking sheet.
Can I use chicken thighs instead of legs?
Chicken thighs work perfectly for this recipe, though they may require 5-7 minutes longer in the oven since they're thicker. The skin-on thighs will give you extra crispiness, and the meat stays juicy even with the longer baking time. Just check for 165°F internal temperature.
How do I make this recipe gluten-free?
Replace the all-purpose flour with 1 cup gluten-free flour blend (like Bob's Red Mill 1:1) and add 1 tbsp cornstarch to the mix. For the breadcrumbs, use gluten-free panko or make your own with gluten-free bread. The egg wash and parmesan can stay the same—just ensure all ingredients are certified gluten-free.
What's the best way to reheat leftover chicken legs?
For crispy results, reheat in a 350°F oven for 10-12 minutes on a wire rack over a baking sheet. If using a toaster oven, 5-7 minutes at 375°F works well. Avoid microwaving—the breading gets rubbery. For extra crispiness, broil for 1-2 minutes at the end.
Can I bake these without parmesan?
Yes, but the flavor will be different. Replace the parmesan with ½ cup grated pecorino or ½ cup crushed cornflakes for extra crunch. For a cheesy alternative, add ¼ cup grated cheddar to the breadcrumb mix. The cornstarch and egg wash will still create that crispy texture, just without the umami depth.